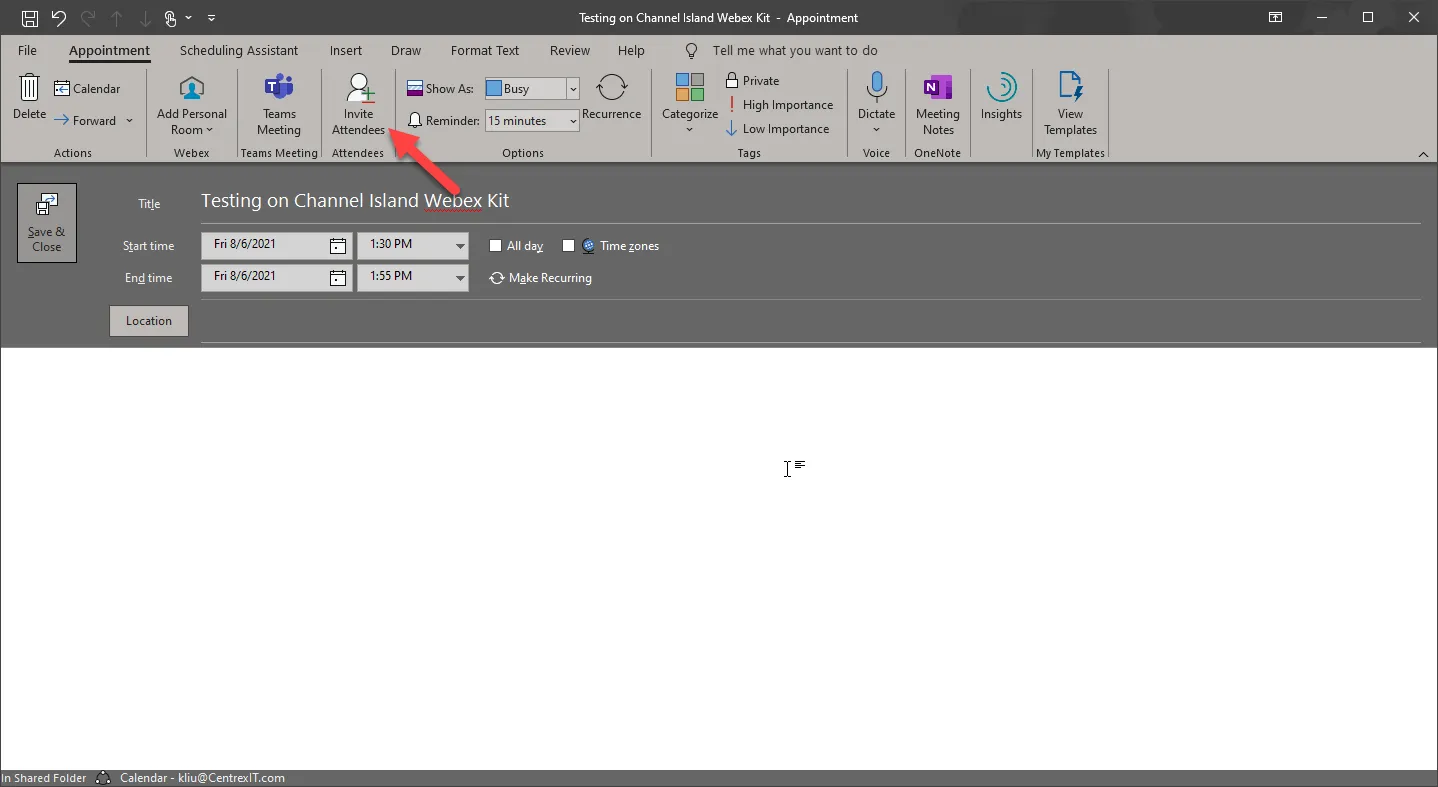
- Create a new appointment in Outlook and then click on Invite Attendees

- Click on Required or Optional
- The address book will open up.
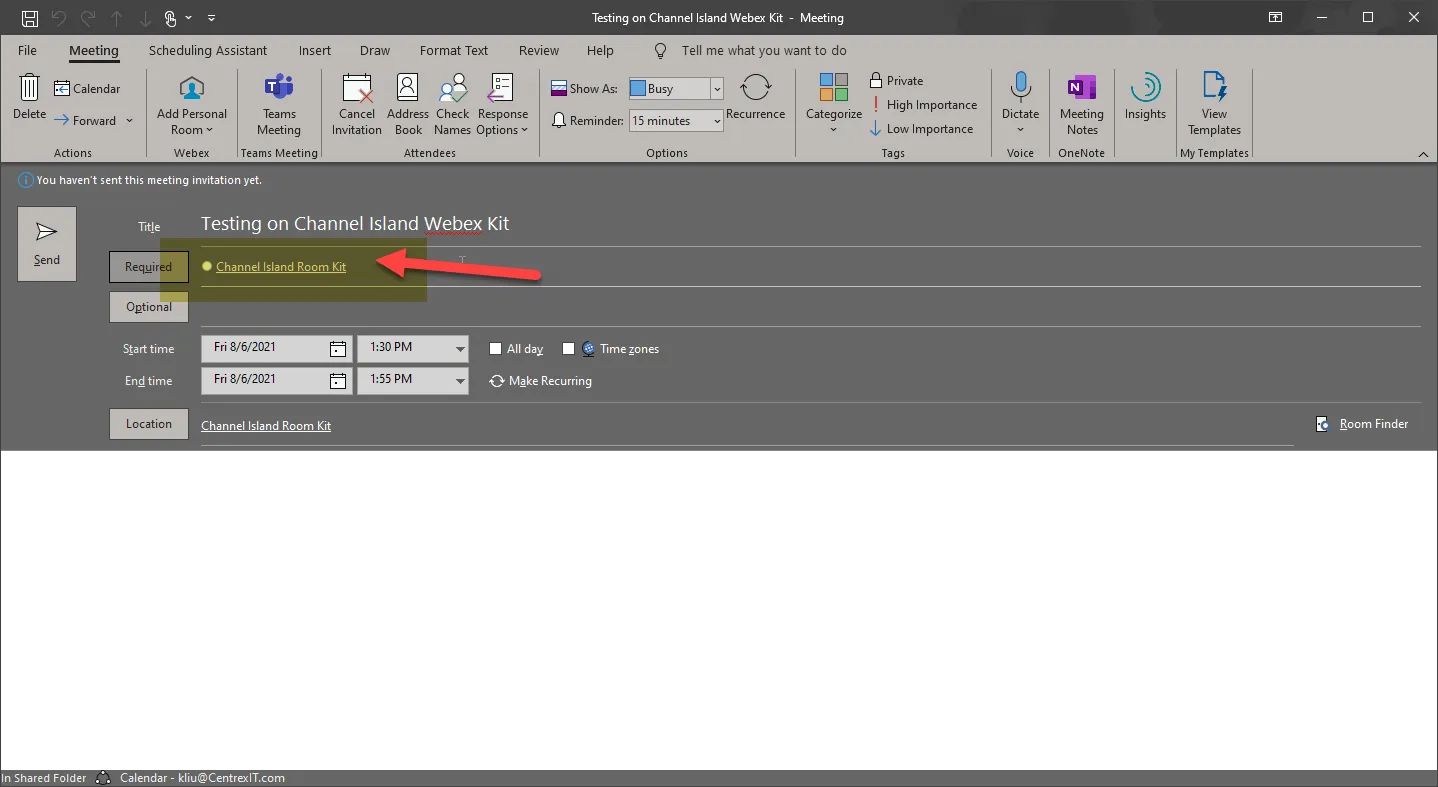
- Put in the conference room kit in the Search (please note all the room kits in the Poway office should/will show as with the display name containing “Room Kit”
- Highlight and click on Resource

- It should display like this:
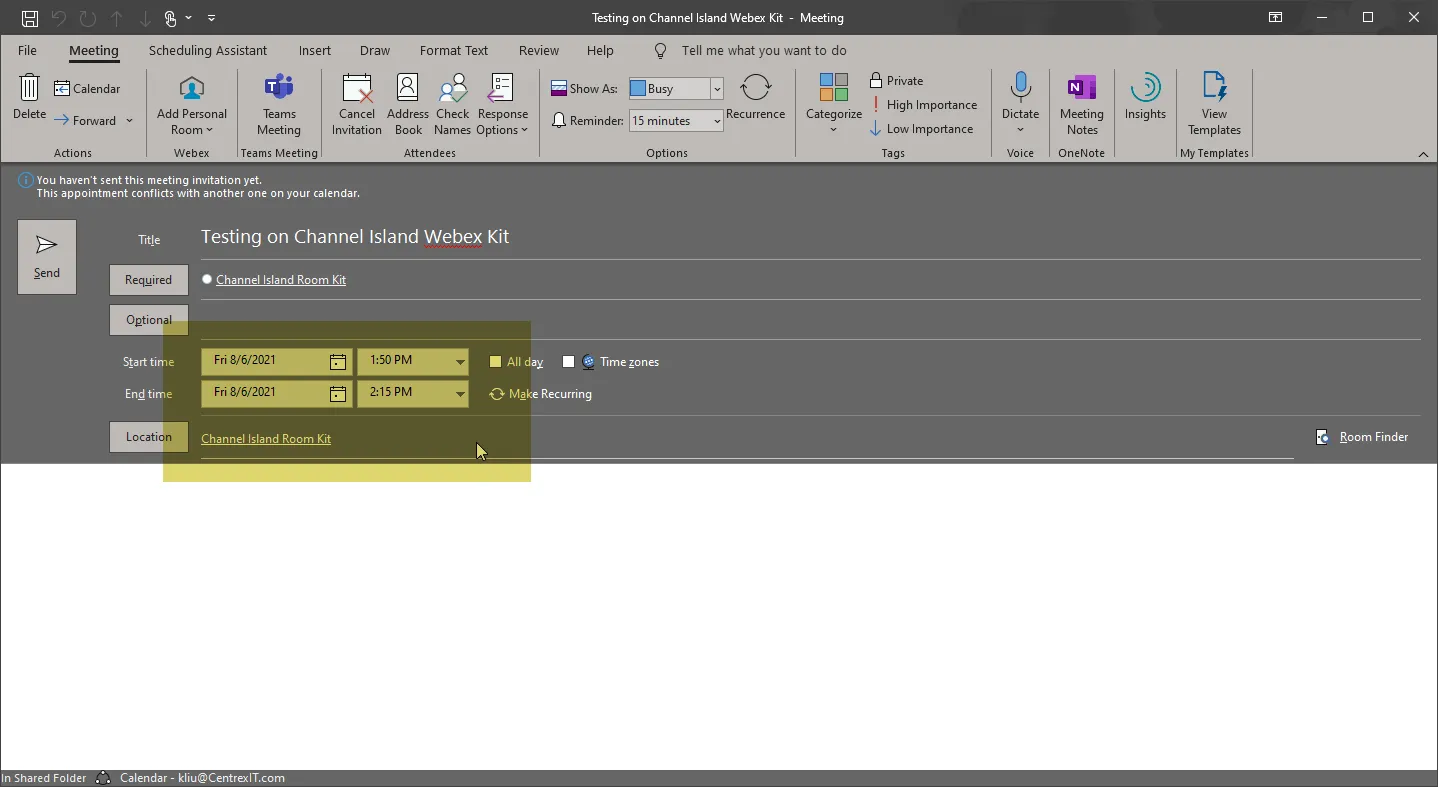
- Add whoever else needs to be in the meeting as Required or Optional
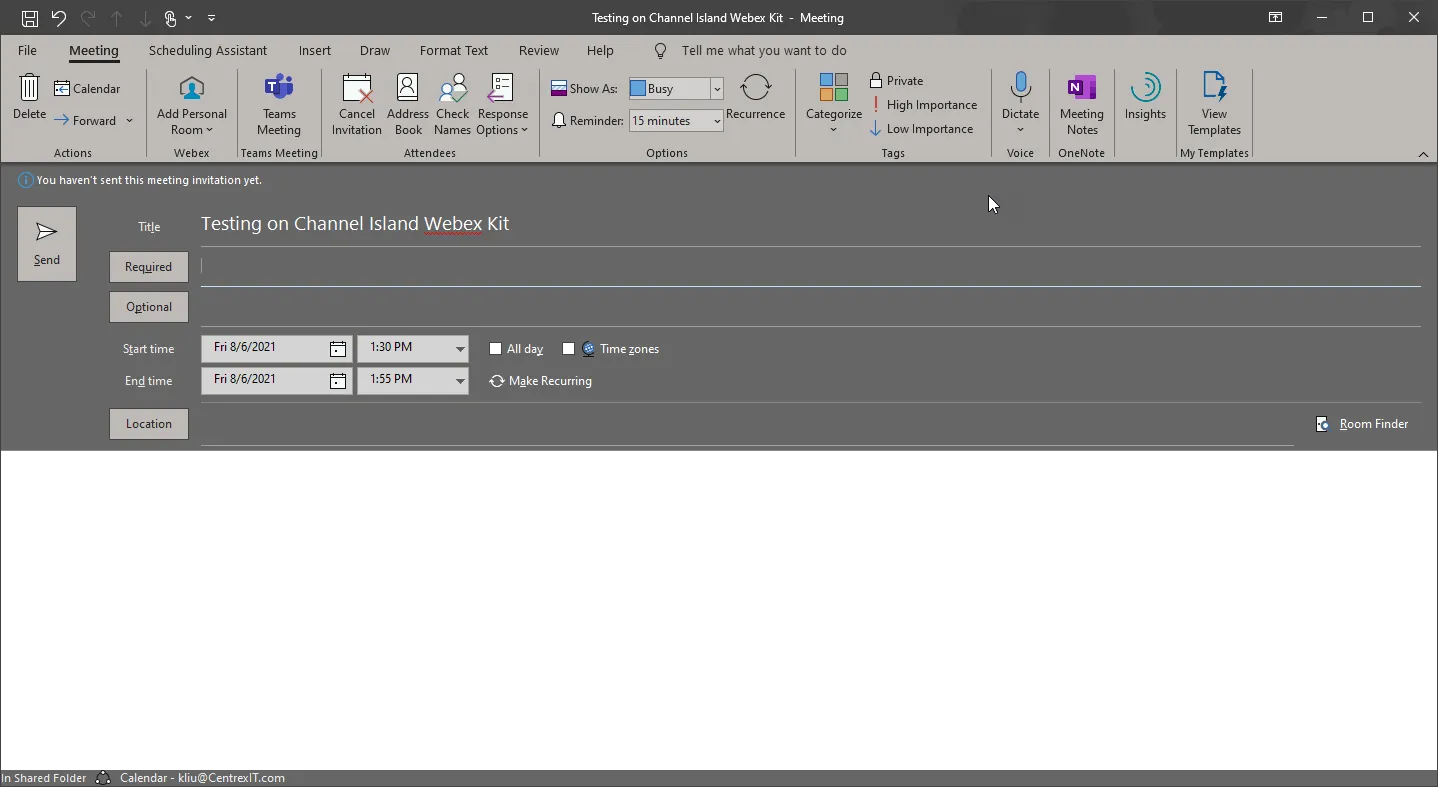
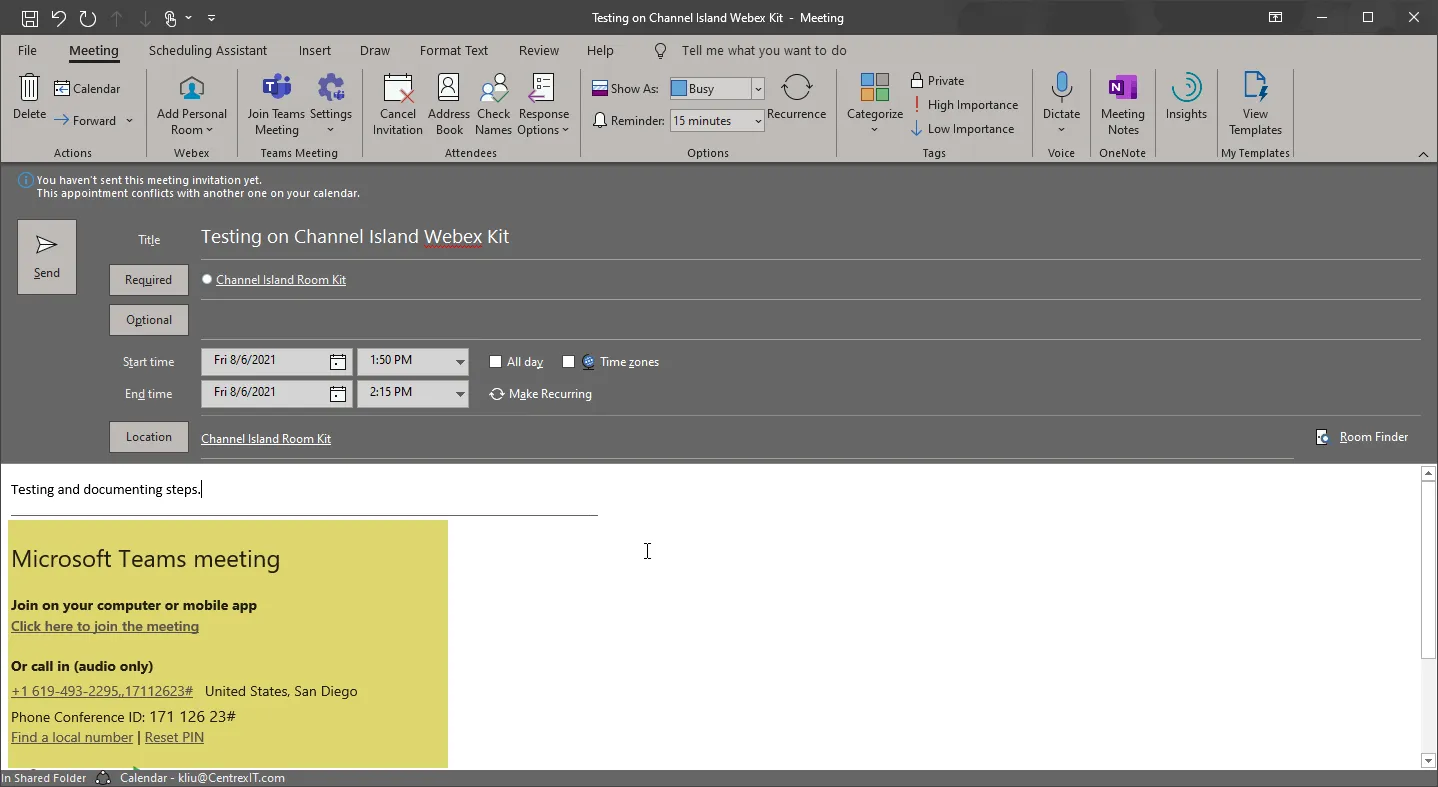
- Set the time and date
- Put in any other information in the meeting and click on Teams Meeting

- The invite should look something like this below. Click Send
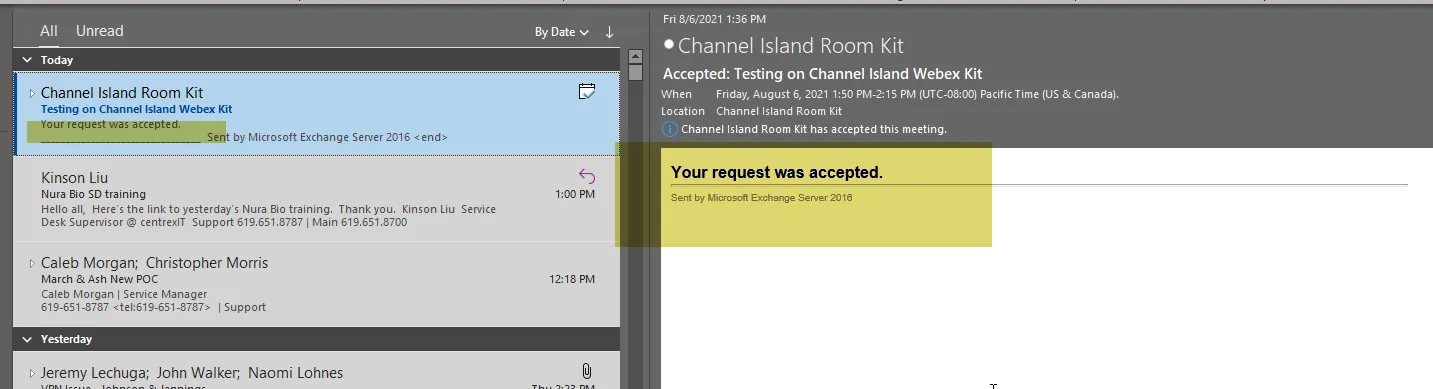
- Wait a few minutes; the organizer should then get an auto-reply from the room kit that this meeting has been accepted or rejected due to conflict
- When it’s about time to start the meeting, as the organizer, please start up the meeting. You can do this from the meeting invite itself
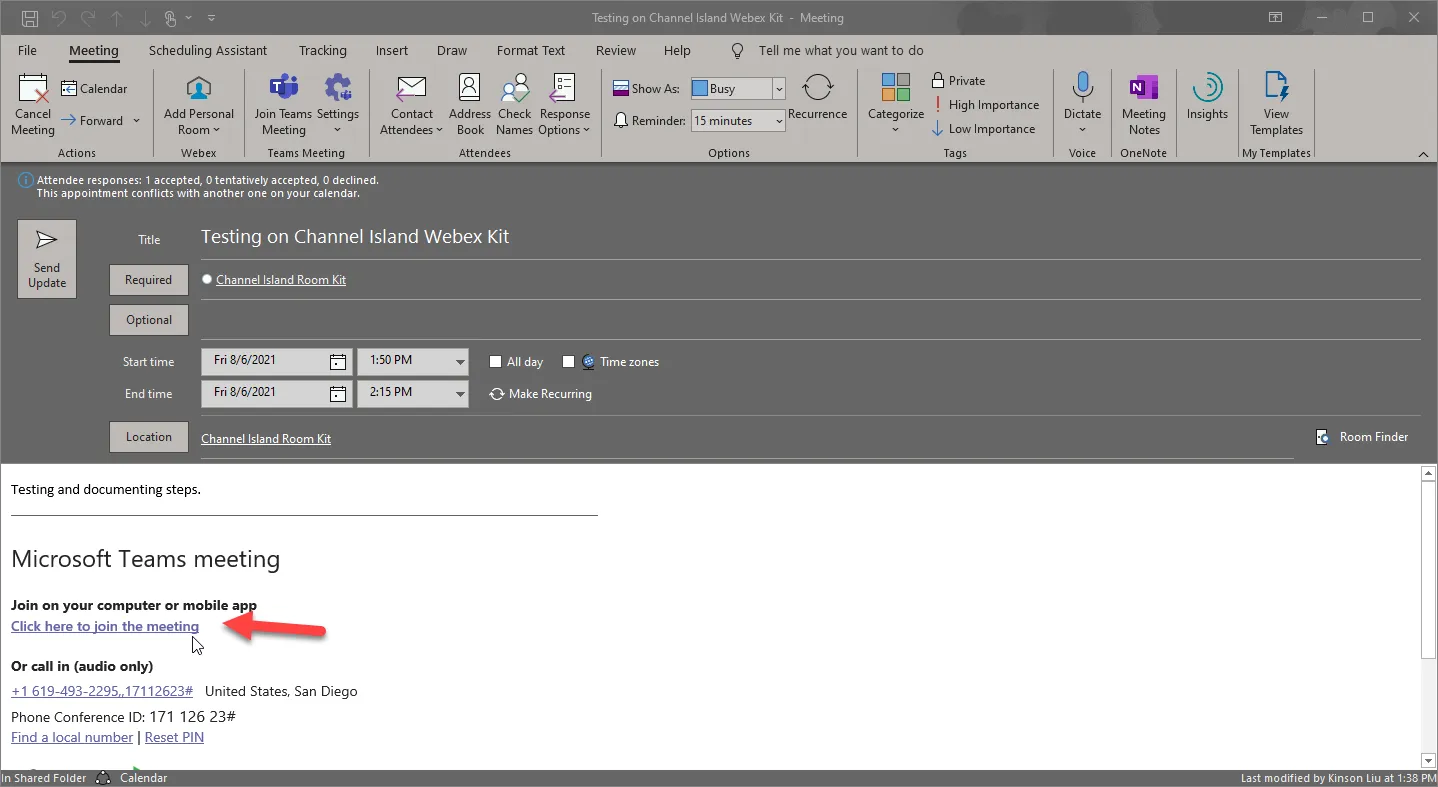
- This can also be done from the calendar view in Outlook
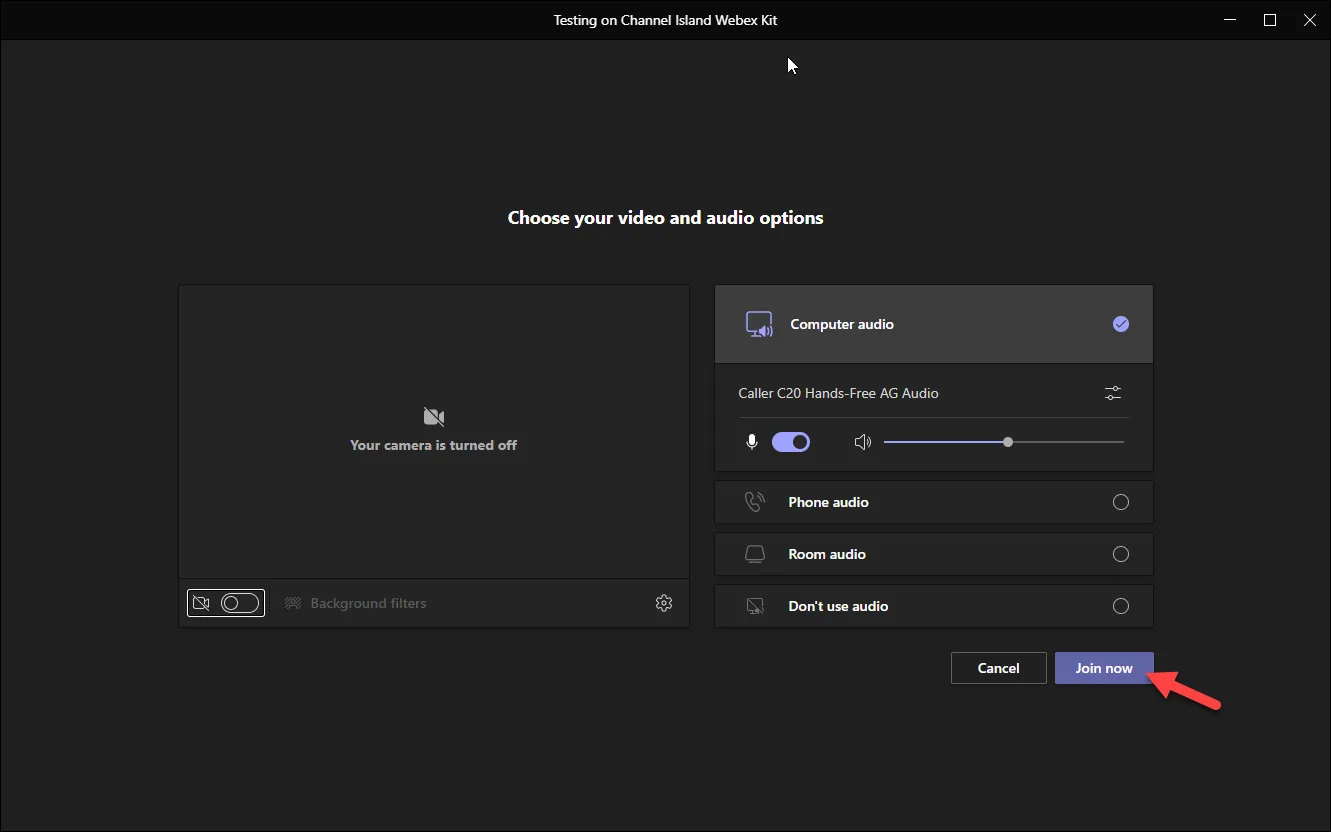
- In the pop-up, click on Join now
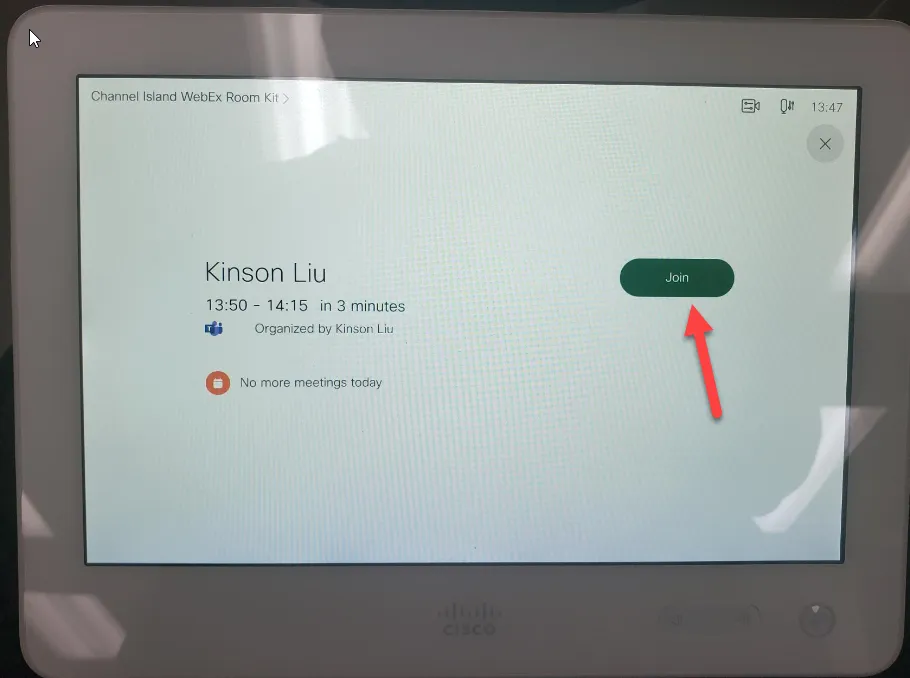
- Five minutes from the meeting start time in the WebEx room kit console, you should see something like this below; click “Join”
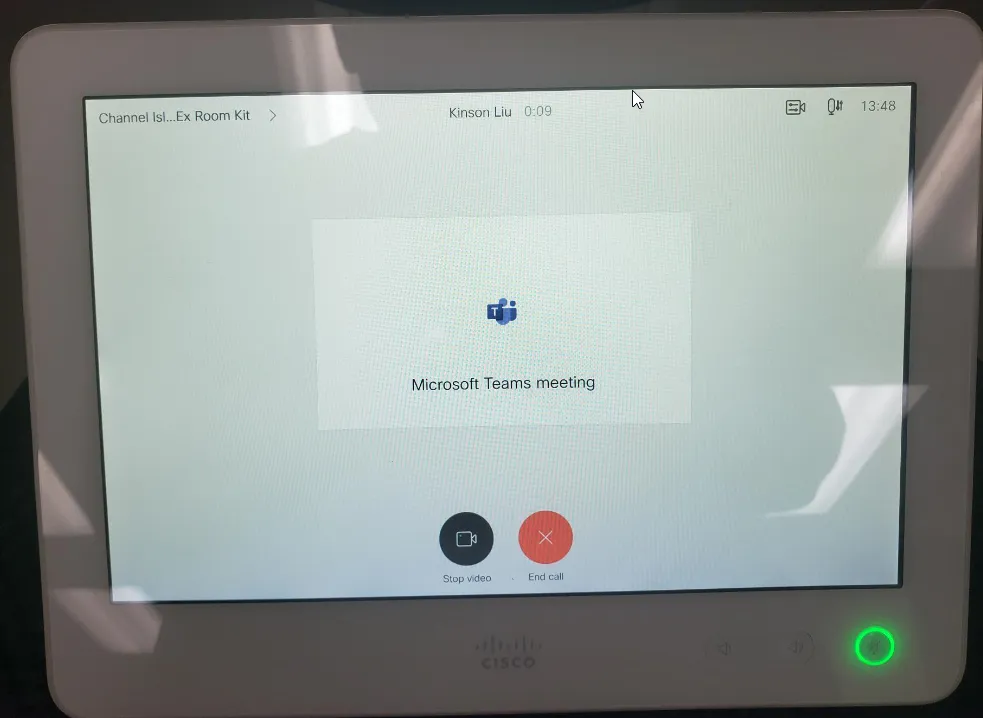
- It should then patch the room kit into the meeting
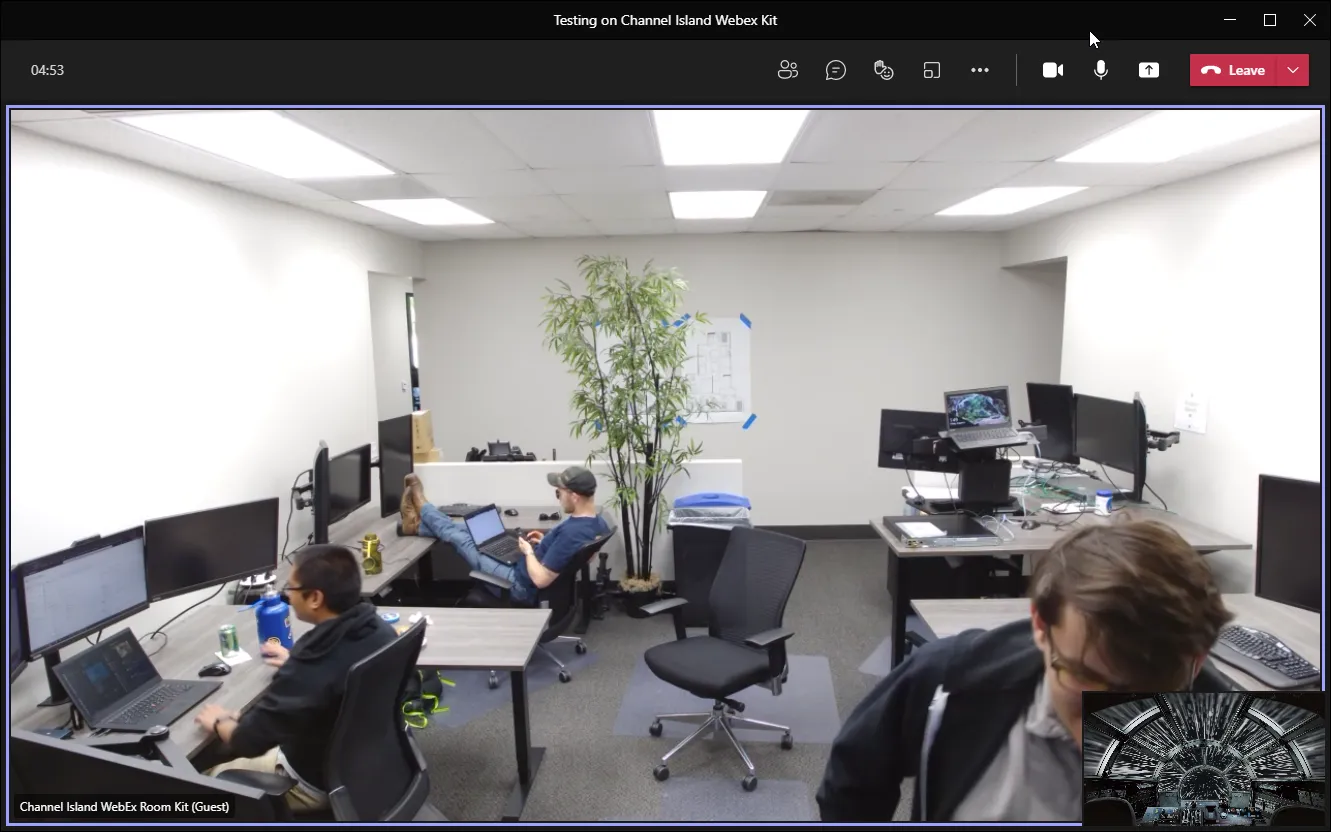
- From the organizer’s screen, you will see a pop up telling you that the Room Kit is in the lobby and waiting to be admitted. Please click on Admit

- The Room Kit should be patched into the meeting and ready to be used
CentrexIT — Schedule the Webex Room Kit to Join Into a Microsoft Teams Meeting
KB00000603Expired
Published May 12, 2023Expires May 12, 2024 (expired)