Purpose:
Section titled “Purpose:”Illustrate use of onboarding PowerShell cmdlet New-UserAccountProvision
Section titled “Illustrate use of onboarding PowerShell cmdlet New-UserAccountProvision”Scope:
Section titled “Scope:”All SDHS new hires, all departments
Section titled “All SDHS new hires, all departments”Responsibility:
Section titled “Responsibility:”Service Desk
Completion Criteria:
Section titled “Completion Criteria:”Attributes, groups, and mailbox permissions in excel sheet from Employee Engagement representative, which should come attached to the ticket, are all correct and accounted for, i.e.:
-
First Name
-
Initials
-
Last Name
-
Display Name
-
Email aligned with displayname and email address policy
-
Sam Account Name aligned with display name and Sam Account Name policy
-
Default temporary password
-
Department
-
Title
-
Campus
-
Supervisor
-
Group Membership
-
Shared Mailbox Permissions
-
MindTouch display name
-
MindTouch email
-
MindTouch username
-
MindTouch temporary passowrd
Records:
Section titled “Records:”The outputs are the resulting objects in Active Directory, Microsoft 365, Exchange Online, and MindTouch.
Steps:
Section titled “Steps:”-
The subject line of the incoming ticket will contain the new employee’s name. You can find the onboarding details in sharepoint here: EE Operations - New Hires
-
Via ScreenConnect, remote into 3020-mini-1
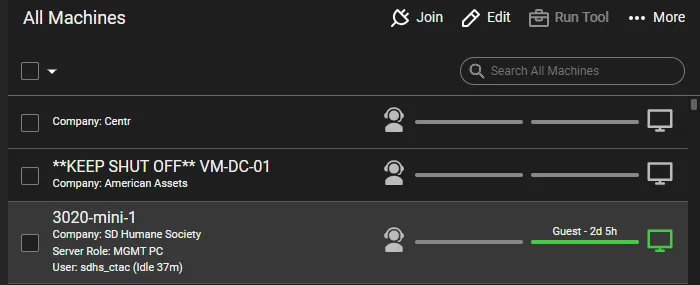
-
Sign in as sdhs_ctac, the domain admin account for SDHS. The password is in 1Password.
-
Start Windows PowerShell

-
Store the default temporary password in a variable. We will pass this to the PowerShell cmdlet later:
-
Type the following into the shell and press
Enter$Password = Read-Host -AsSecureString -
Type
Puppy123456!and pressEnter
-
-
Type the following into the shell (hint: tab complete should work after “New-U”:
New-UserAccountProvision -
Add a space after the above
-
Fill in all parameters:
-
Type
-(en dash) then pressTab. You should see a parameter name, e.g.,FirstName, appear directly right of-, e.g.:NewUserAccountProvision -FirstName -
Enter the parameter value right of the parameter name, with one space in between name and value, e.g.:
NewUserAccountProvision -FirstName Jane -
Add a space after the parameter value
-
Start again at step 1 of this loop and repeat until you see the
-Verboseswitch. You can delete this switch when it appears. Some special cases are worth mentioning:
-
-
If there is whitespace within the value, most often this happens in
Title, quote the string, i.e.:`New-UserAccountProvision -FirstName Jane -Title` ***`'Animal Care Associate'`*** -
For the
-Passwordparameter, use the$Passwordvariable that was stored eariler, i.e.:`New-UserAccountProvision -FirstName Ryan -Title "Dedicated Support Analyst II"` ***`-Password $Password`*** -
The
CampusandDepartmentparameters will only take input that matches the names of the respective OUs in Active Directory. For this reason, tab completion support was added. For example, if you type`New-UserAccountProvision -FirstName Jane -Initials B -LastName Doe -DisplayName 'Jane Doe'` ***`-Campus Gaines`***and press `Tab` you will see `Gaines` change to `Gaines 5433`. If you continue to press tab, it will cycle through all possible parameters that start with a *G*. This works similarly for `Department` -
Below is a full example usage of the cmdlet:
`New-UserAccountProvision -FirstName Jane -Initials B -LastName Doe -DisplayName 'Jane Doe' -Campus 'Gaines 5500' -Department 'Animal Care' -Password $Password -Title 'Animal Care Associate'`
- When all parameters are entered accurately, press
Enter.
- If an error is thrown referring to a remote session with Exchange, closing the shell and reopening it should resolve the error
-
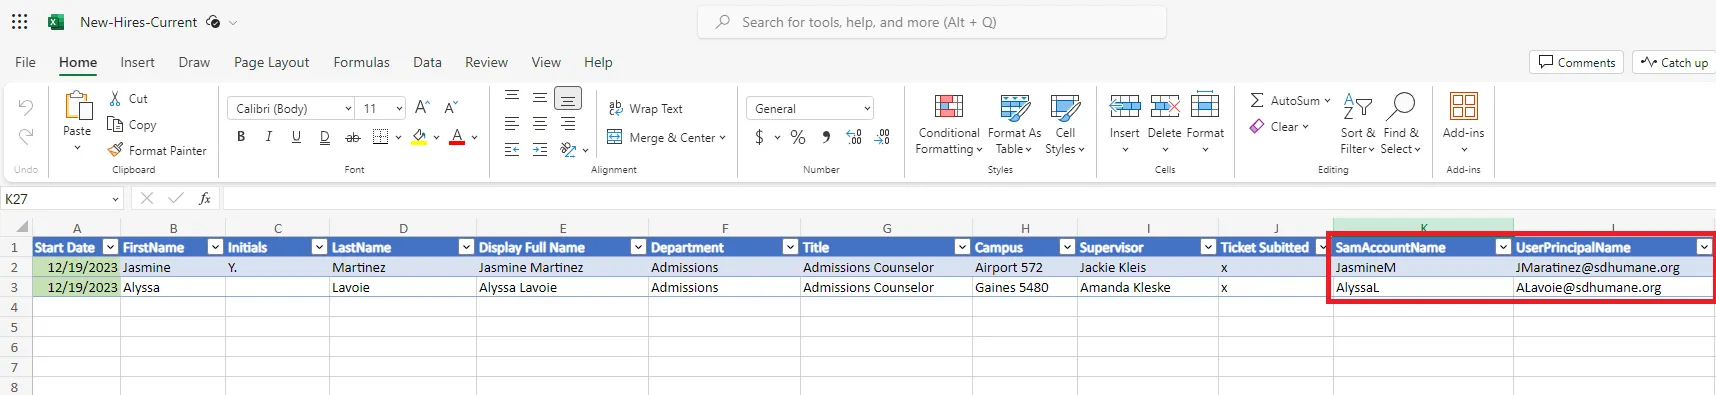
The script will output the
SamAccountNameandUserPrincipalNameof the new hire. Put these in the matching fields in the excel sheet at this location: New-Hires-CurrentSample output:
New user Jane Doe's SamAccountName:JaneDNew user Jane Doe's UserPrincipalName:JBDoe@sdhumane.orgAll set!
1. Open *Active Directory Users and Computers*

1. Browse to the new hire that was just created1. Ensure that attributes were added correctly, and manually add the user's manager in the *Organization* tab1. Add all on-prem distribution and security groups in *Member Of* tab1. Type `sync` into the PowerShell window and press `Enter`. This will manually sync the new hire to the Microsoft tenant via AD Connect1. Sign into the SDHS M365 tenant1. Select the user that was just created 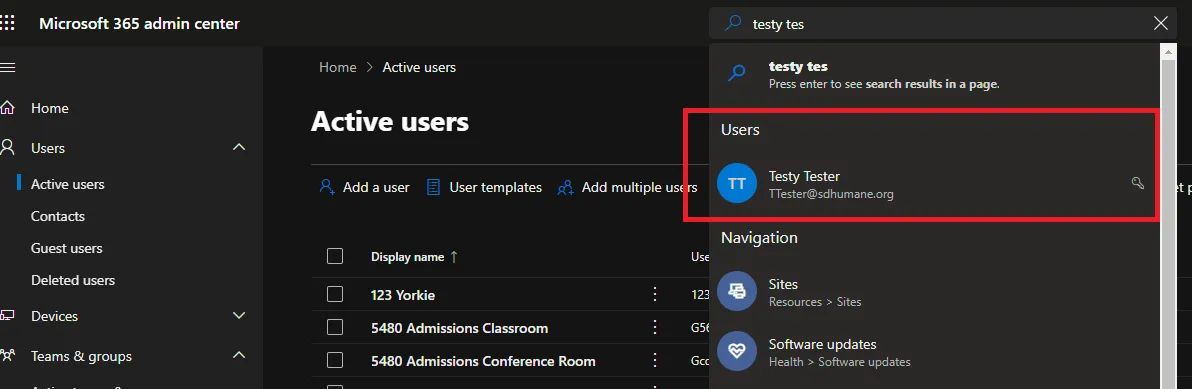
1. Click *Manage groups*
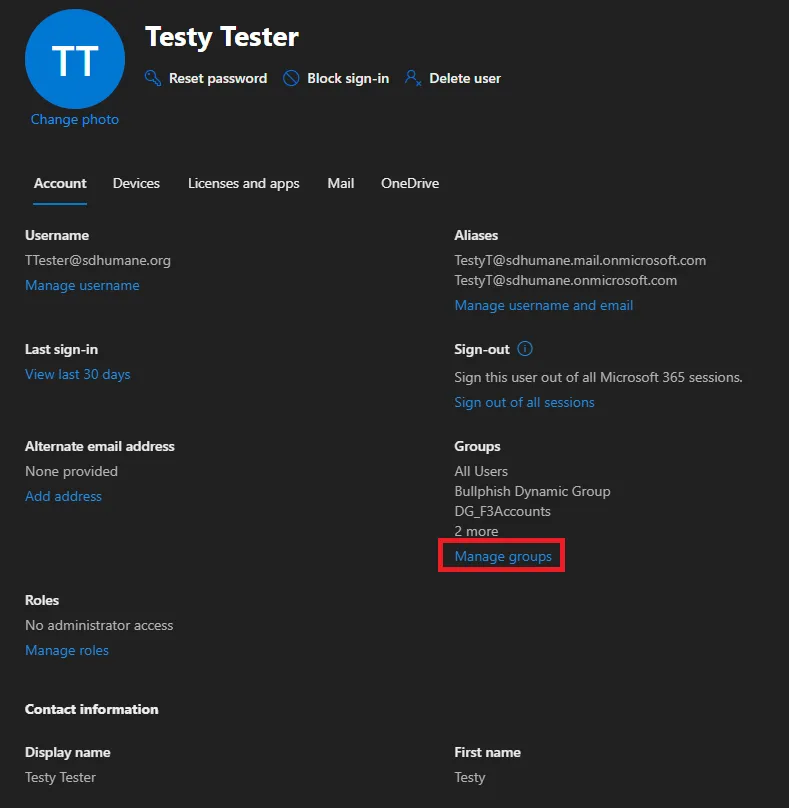
1. Add all cloud group membership
- Keep in mind that Microsoft licensing is applied by group. In most instances one of three groups will cover the licensing: *E1-F3-Licensees, E3 Licensees, and Business Premium Licensees*.
This group membership should be included in the Excel document for the new hire
1. Navigate to [resources.sdhumane.org](resources.sdhumane.org)1. Click *Sign in* and login as sdhs\_ctac (same credential as domain admin above)1. Navigate to *Site tools -> Control panel -> Users -> Add New User*1. Using what was generated by the PowerShell cmdlet above, input as below:
- Username = UserPrincipalName
- Display Name = DisplayName in AD
- Email = UserPrincipalName
- Password = Puppy123456!
1. Keep *Community Member* checked and add to group *Staff_Viewer*1. Click *Add User*
---### Process References:
1. Create a relationship back to related process.Note: Please add KB relationships to core process, process, SOPs or other WIs on the right.