Purpose:
Section titled “Purpose:”Before time entries can be made and tracked for a client they must first be made a Customer in Pzzle.
Scope:
Section titled “Scope:”Account Administration
Responsibility:
Section titled “Responsibility:”Steps for this WI to be completed by the Account Administrator
Completion Criteria:
Section titled “Completion Criteria:”-Client name appears under Companies>Customers section of Pzzle.
Records:
Section titled “Records:”O:\Clients(Client Name)\Contracts - This is where the fully executed agreement is stored.
Steps:
Section titled “Steps:”- Make sure the company is in the “opportunity” lifecycle stage in Hubspot so it syncs over. Sync times are 9:55 pm and 9:44 am.
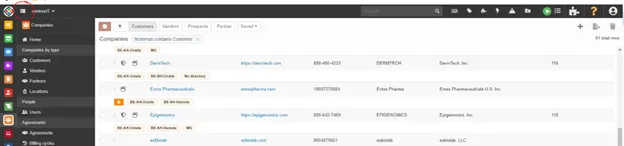
- In Pzzle under Companies (no filters) search for the company name you are needing to add as a customer. If the sync has occurred from Hubspot you should find their name in the list. Once you locate the company click into their profile. *remove the filter by clicking on the “x” next to “Schemas contains Customer” in the filter section near the top of the page.
- Under the “Customer” tab at the top toggle the “Customer Enabled” to the on position. Click “save and stay here” at the top right of the screen.
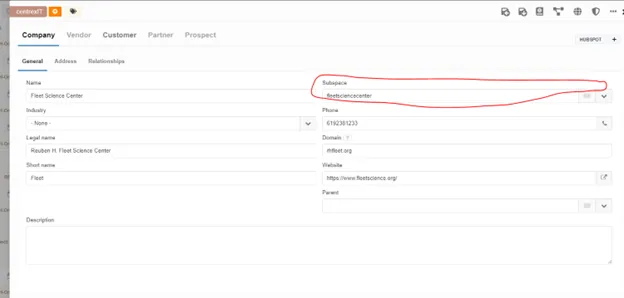
- On the Company>“General” tab verify the following fields are accurate and that Hubspot and the Pzzle company record are all the same matching and accurate information.
- Industry – Pzzle has not developed this yet. Nothing to add.
- Legal name
- Short Name - this you will create/add (It should be an abbreviated name of the company but one that is recognizable). Example: Fleet Science Center short name would be “Fleet”
- Phone
- Domain – not found in Hubspot
- Website
- Click “save and stay here”
- Under the “address” tab verify the address is correct in all fields and matches what is in Hubspot and on agreement. Click save if you made any changes. *Suite/Unit to go in “Address 2” field.
- Click “save and return to previous page”
Add Locations:
- Add locations by going to the “location” tab (in the tabs in the lower section of the screen) and hitting the plus sign in the right corner to add a location.

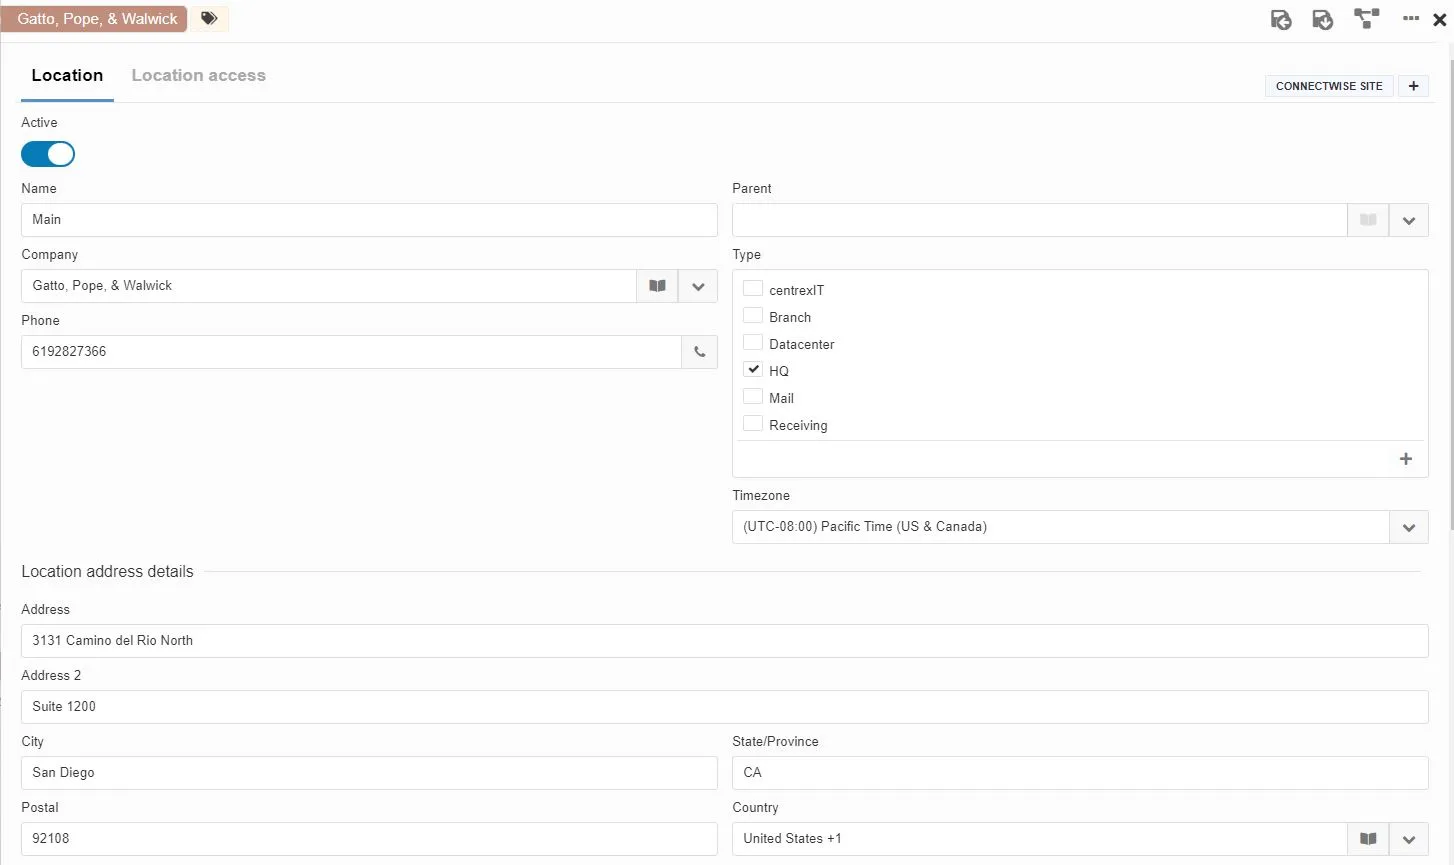
- Add the Main location by completing the following fields.
- Toggle to Active
- Name: Main
- Type: From selection box select “HQ”
- Timezone: select from the drop down
- Phone Number: add
- Address: add -Suite/Unit goes in “Address 2” field
- City: add
- State: add
- Postal: add
- Country: add
The completed address will look like the below screen shot.
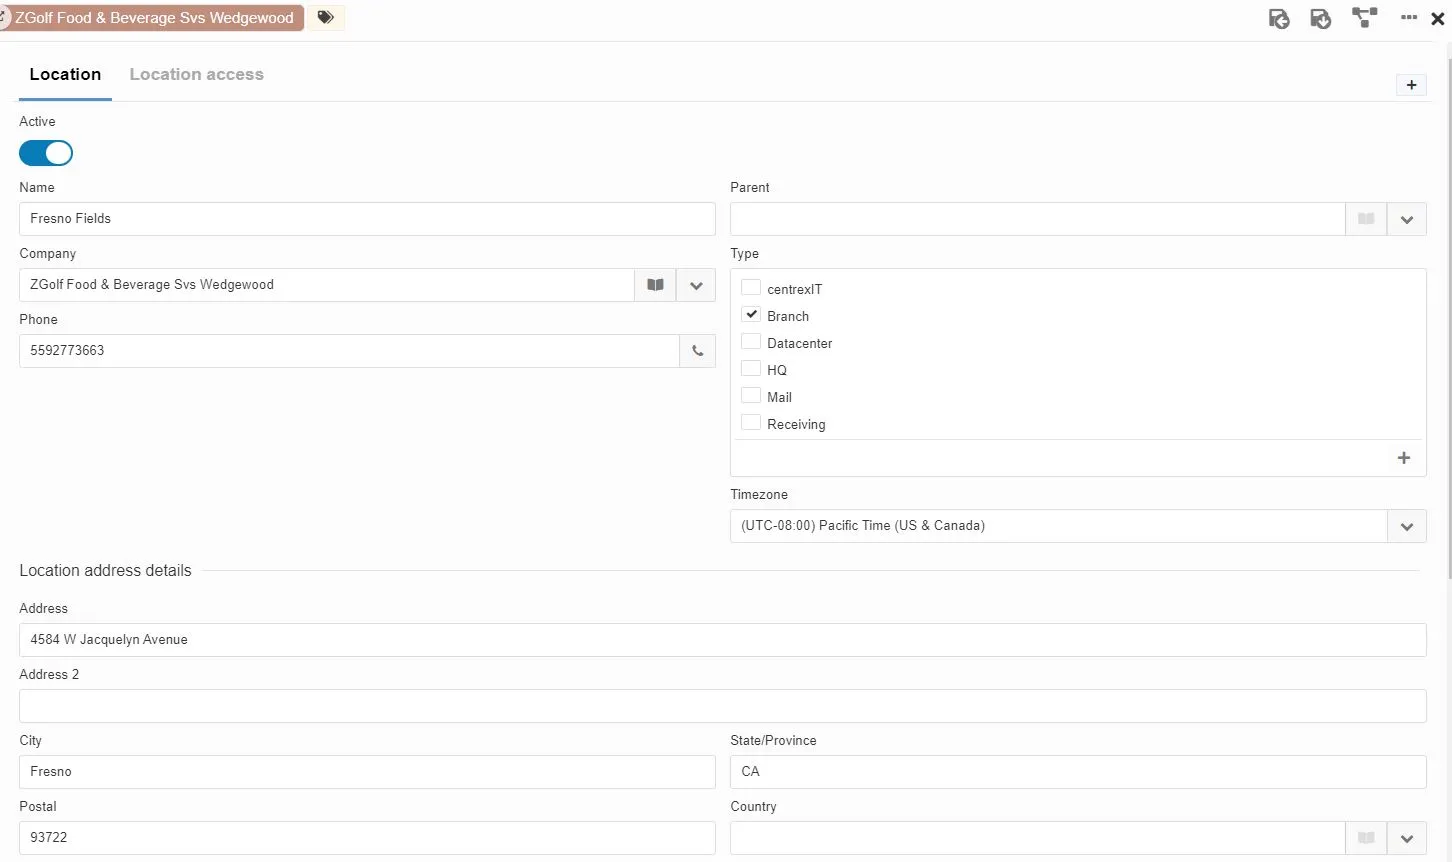
 3. If the company has additional locations add them by following the same steps above. The only difference is you would name the location what they call it and select “Branch” or whatever is appropriate from the “Type” drop down.
Create Subspace:
- Click into the drivers license in the upper left
- Collapse tree by clicking the tiny arrow next to centrexIT (Production). The screen shot below shows what it will look like once you have collapsed centrexIT (Production).
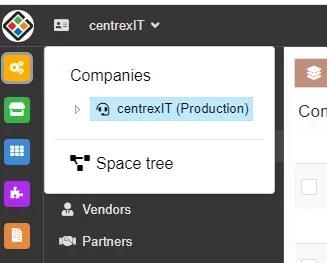
- Click into “Space Tree”
- Click the drop down arrow next to Production and select “create new”
- type company name all lower case no spaces
- role is production
- do not change parent space – it should say production
- in the drop down under creation definition select SM + Work + Pzzle
- Click “ok” in the bottom right
- X out of this screen in the top right
- Locate the Company name under the Customers section of Pzzle and click into it.
- Now that you have created the subspace you can add it to the subspace field. Click on the drop down and search for the subspace name you just created. Select it and click “save and stay here”.
Add Relationships:
- Under the “Relationships” tab add the following relationships
Below are screen shots for how you will add/attach a relationship under each section.
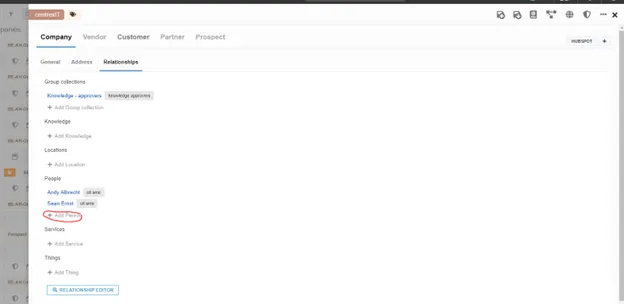
- Add/attach the following relationships:
Group Collections – click the plus sign and search and add
- “knowledge – approvers” (select the one that does not have the brown arrow next to it).
- “knowledge - approvers public”
- “Change Advisory Board Approvers”
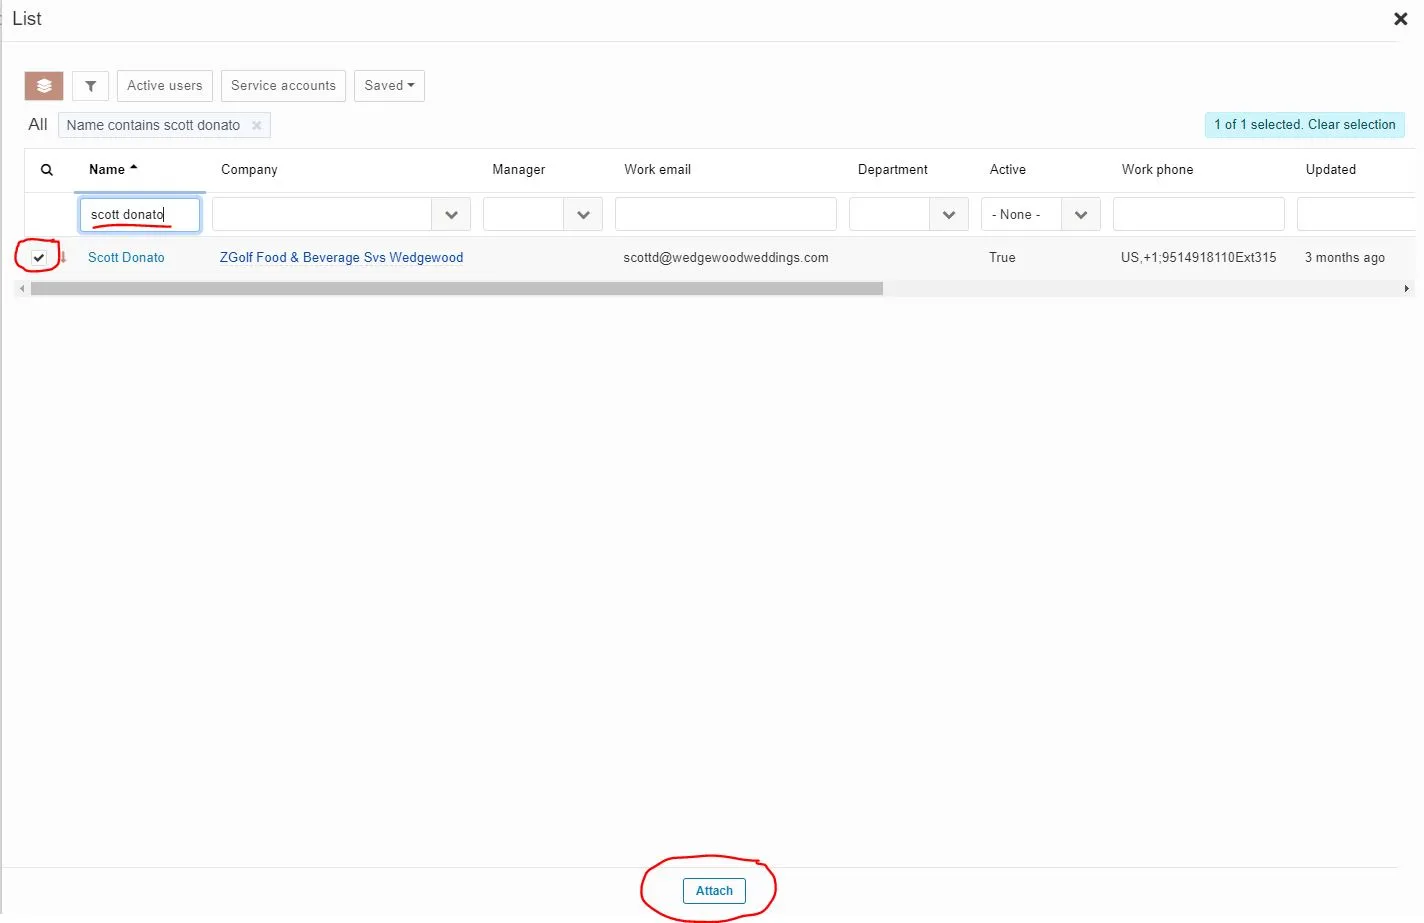
People – click the plus sign and select and add the following
- CIT SME – Sean Ernst
- CIT SME – Andy Albrecht
- CIT invoice approver – Erich Beck
- VCIO – search for name name add
- VITM – search for name and add
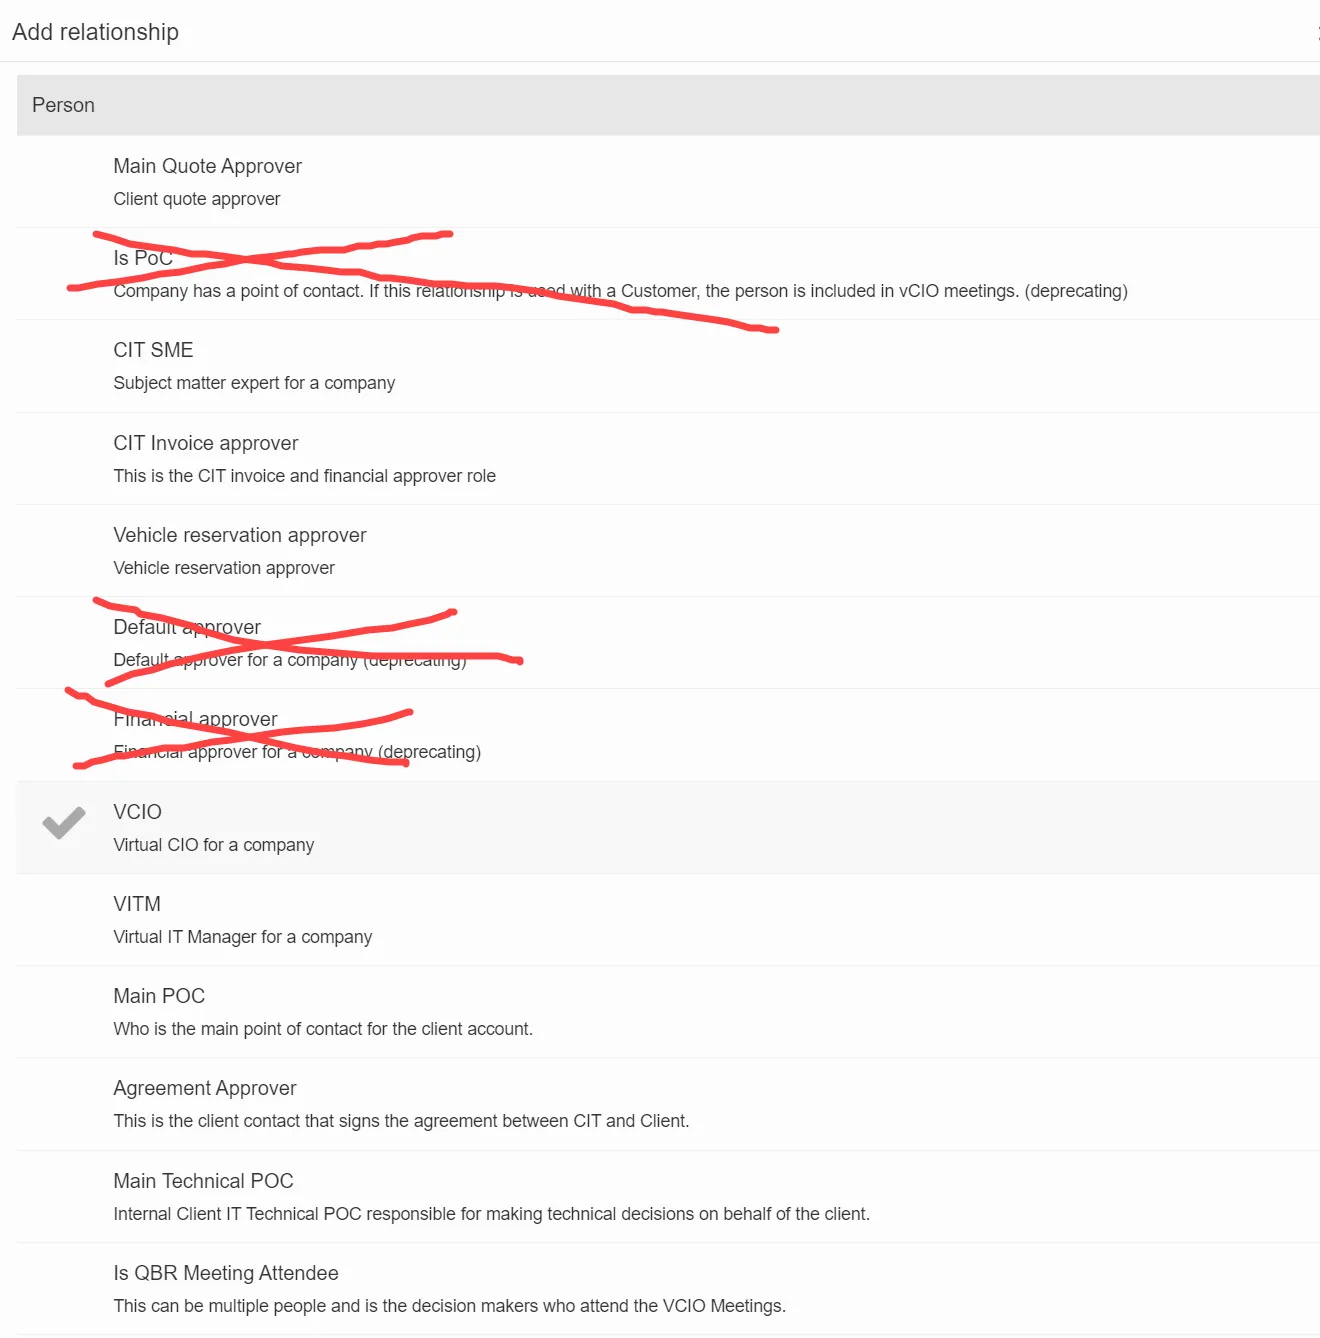
The following relationships cannot be added until onboarding is complete and the user sync has been completed. You will not find the POC’s names in Pzzle until this has been done.
- Main POC
- Agreement Approver
- Main Technical POC - check with vCIO to confirm if they have one
- QBR Meeting Attendee
- Main Quote Approver
- Click “save and stay here”
- Once the user sync has been completed you would also want to mark all POC’s as VIP’s. Under the “People” tab. There is still internal discussion on what VIP means, who is responsible for creating them or getting the list from the clients and maintaining it as well as how many VIP’s a client should have. As of right now the VIP tag is for internal purposes. Contractually there is nothing saying we have VIP’s or being a VIP entitles the end user to something. This is just an internal tag so we know who our VIP’s are for our clients. This should mainly be C level’s, POC’s and decision makers of the company.
Add Tags:
Add “onboarding” tag for new clients onboarding.
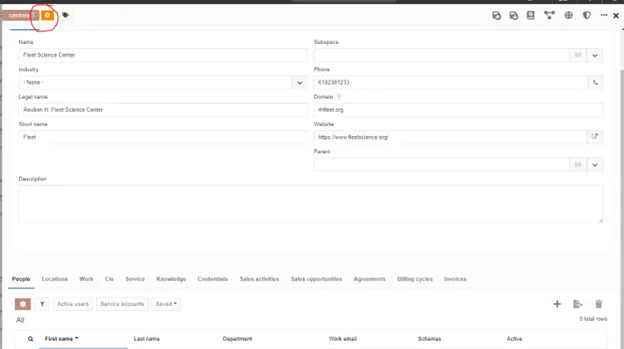
- To add an onboarding tag click on the tag icon located at the top left and type onboarding. Hit enter on your keyboard once you have typed the word.
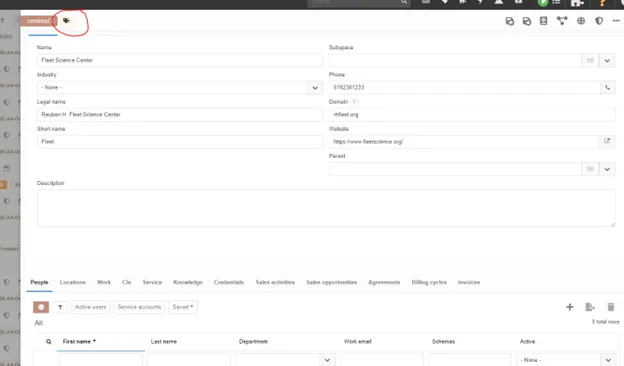
- Once you have typed the word “onboarding” and hit enter on your keyboard the tag will turn to orange. This is how you know you did it correctly.
- Click “save and stay here”
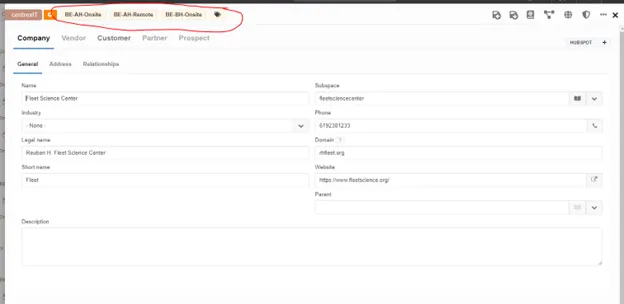
Add BE Tags for entitlements turned off in the agreement. For any entitlement in the agreement that the client does not have hours allocated for you will need to add a BE (billable event) tag to the customer in Pzzle. This allows for billable work types used on time entries by the service delivery team to end up in the billing queue to be reviewed and invoiced at the end of the month. These tags need to be added until invoicing is designed in Pzzle as these billable events get pushed to ConnectWise for invoicing at the end of the month. Account Mgmt Team review all billable events in the queue and push them to CW if they need to be invoiced.
- Locate the manageIT schedule in the agreement and verify what entitlements have “0” hours allocated. For any entitlement that has a “0” the client must have a billable tag added for that work type. The billable work type tags are as follows:
- BE-BH-Onsite = Business Hours Onsite
- BE-AH-Remote = After Hours Remote Support
- BE-AH-Onsite = After Hours Onsite Support
- To add a tag click on the tag icon in the top of the customer screen and type the tag exactly as it is above and hit enter on your keyboard immediately after typing the word. This creates the tag. YOU MUST TYPE IT EXACTLY AS IT IS SPELLED ABOVE INCLUDING CAPITALIZATION.
- Click “save and stay here”
Below is an example of what the tags look like once they are added.
Setup CW/Pzzle Integration Schema for Billing:
- Locate KB in Pzzle for “Pzzle & connectwise integration schema for billing”
There is a relationship to the KB in this KB that you can click on to easily navigate to it.
Setup Agreement in Pzzle:
- Locate KB for “Adding a manageIT agreement to Customer in Pzzle”
There is a relationship to the KB in this KB that you can click on to easily navigate to it.
Process References:
Section titled “Process References:”- Create a relationship back to related process. Note: Please add KB relationships to core process, process, SOPs or other WIs on the right.