Nura Bio – New User Onboarding
Section titled “Nura Bio – New User Onboarding”CC Maria Brar and Santosh on all comms.
1. In an incognito tab, log onto portal.office.com with the Office 365 Admin account (registration@nurabio.com) credentials provided in PWState.
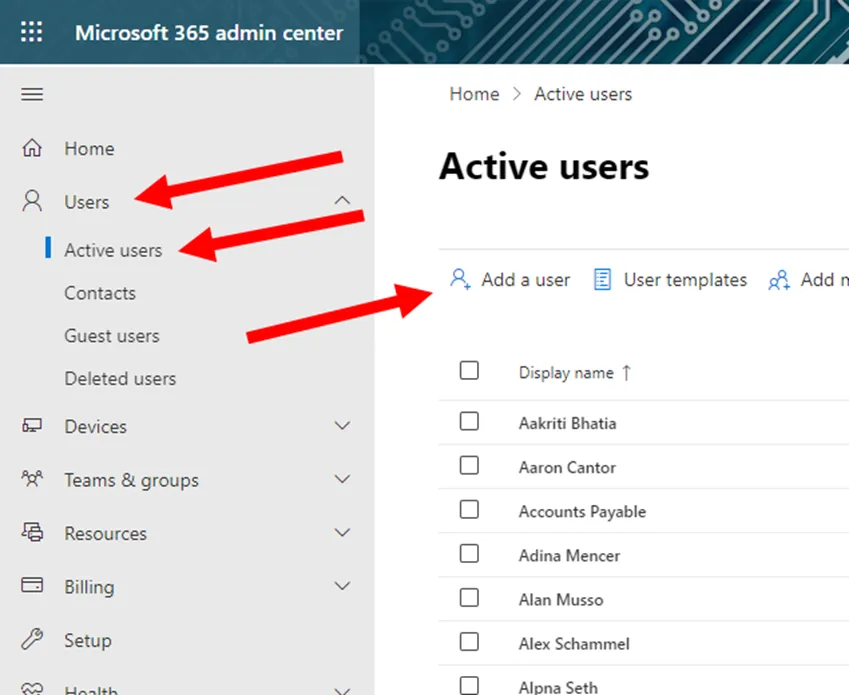
2. Navigate to the Admin portal.
3. Select Users > Active Users, then select Add a user.
4. Fill out the provided fields with the information provided in the New User Ticket. The username will follow the “FLast” format. Follow the [NURA][Year][User First/Last Initials Lowercase][!] standard when creating the user’s password.
Ex: NURA2024lf!
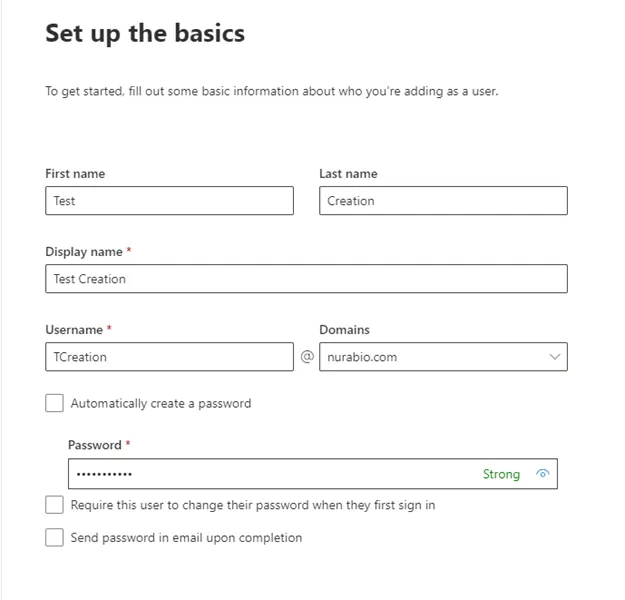
Hit Next when filled out.
5. Unless specified, apply a Microsoft 365 Business Premium license. If one is not available, please reach out to Dylan Quiros. If he is not available, reach out to a lead for assistance. Hit Next once applied.
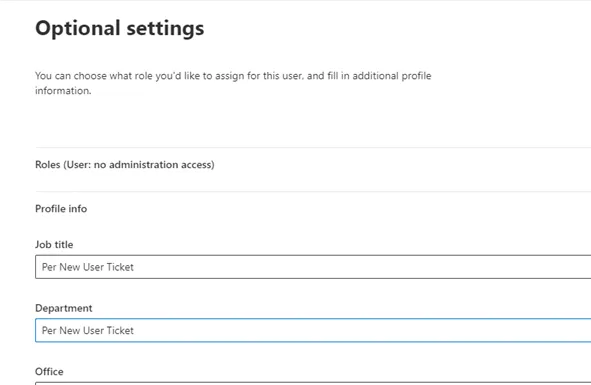
6. Update the Profile Info based on the New User Ticket. If you do not have the information, leave it blank. Hit Next once filled out.
7. Review account, hit finish if all good, then close.
8. Based on the New User Ticket/form, add all requested groups/distribution lists/mailboxes. (This category does change based on the user’s department. Here are the basic required groups per department. (Refer to this for standard Box access as well) (All users are added to bullphish security group)
Biology – All@nurabio.com (DL), Internal (DL and Box), Research (Box), Biology (365 Group and Box)
Chemistry – All@nurabio.com (DL), Internal (DL and Box), Research (Box), Chemistry (365 Group and Box)
G&A – All@nurabio.com (DL), Internal (DL and Box), Biology (365 Group, Box), G&A (DL and Box)
9. Most New Users will require a Box account. In a new tab, navigate to https://account.box.com/login. And log in with the provided credentials in PWState.
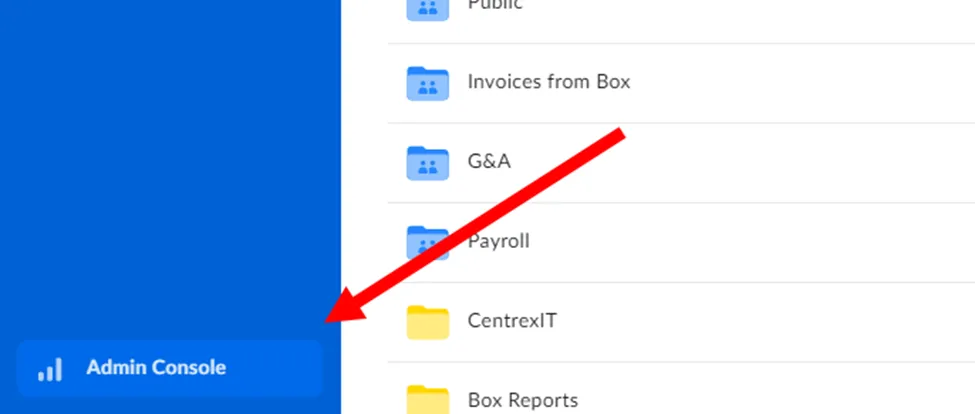
10. Select Admin Console at the bottom left of the page.
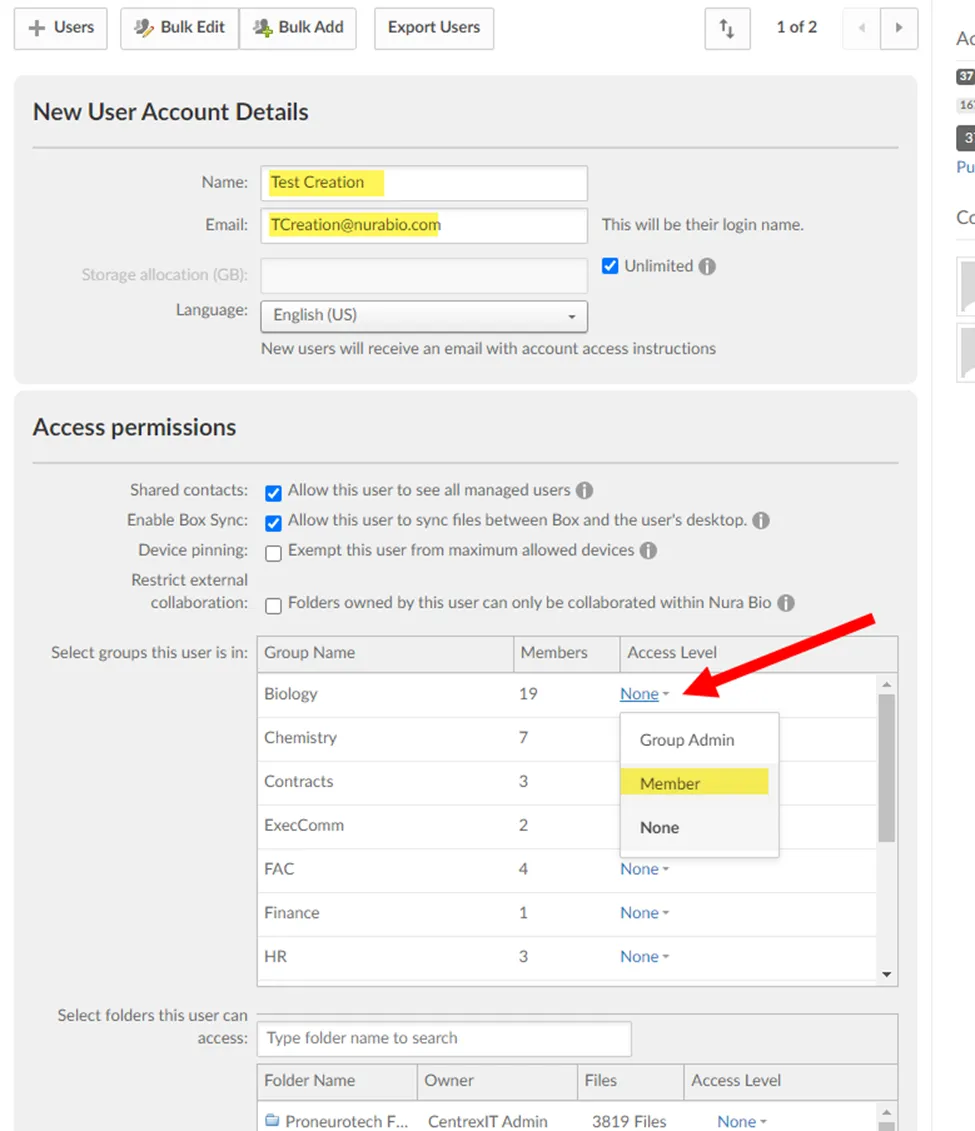
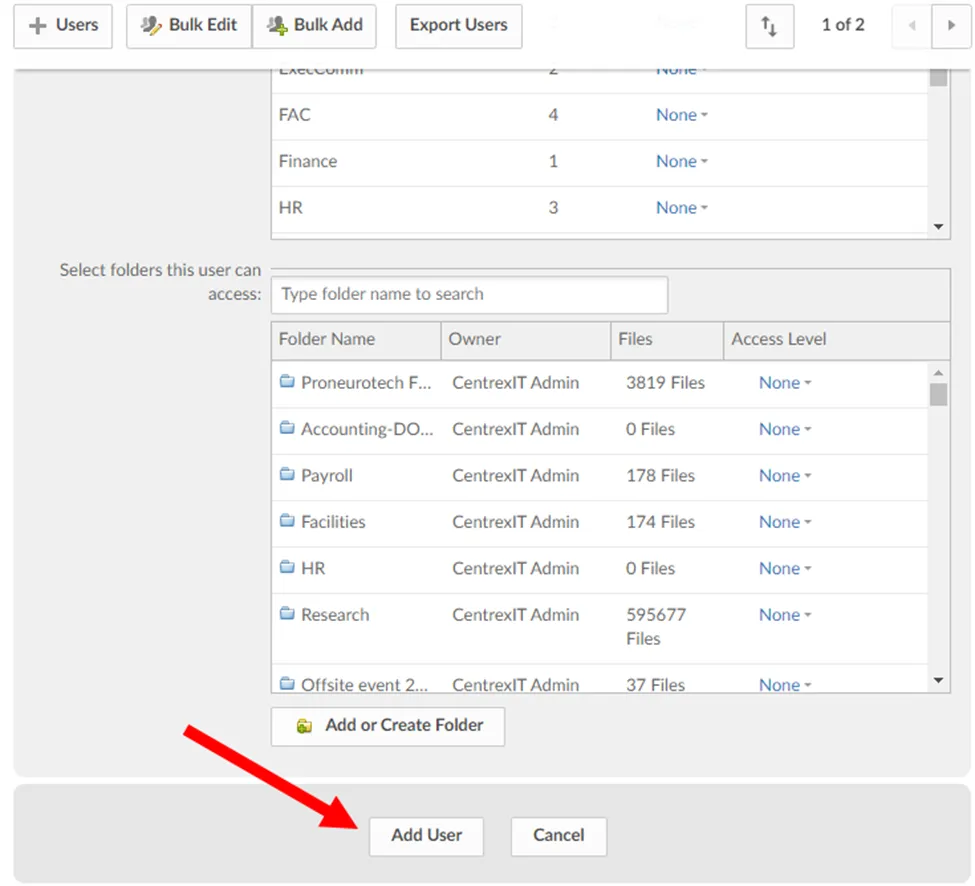
11. From the Admin Console, navigate to Users and Groups, then hit +Users. Fill out the provided prompts with the information based off the New User Form. Adjust Group access level based on New User Form as well.
12. Once user permissions have been added, scroll down, and select Add User. Once you add the user, they will automatically be sent an invitation for Box.
13. Next, on a new web browser, navigate to https://zoom.us/ . Log in with the Zoom Admin credentials provided in PWState (centrexit@nurabio.com). Then, under User Management, select Users on the left-hand side**.**
14. On the right-hand side of the page, select + Add Users.
15. Fill out the provided fields if information is available on New User Form, if not, leave blank. New User’s will need a licensed Zoom account, if a license is not available, reach out to Maria Brar through the ticket requesting one.
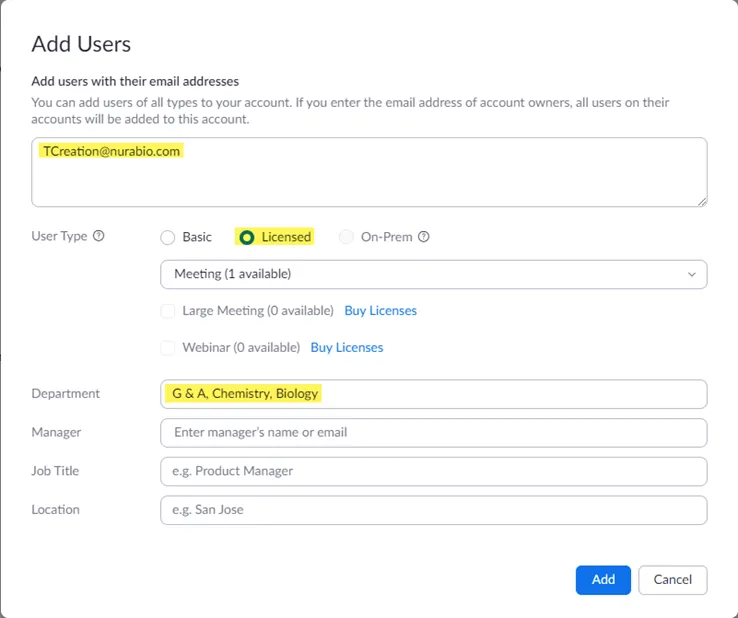
Hit Add once completed.
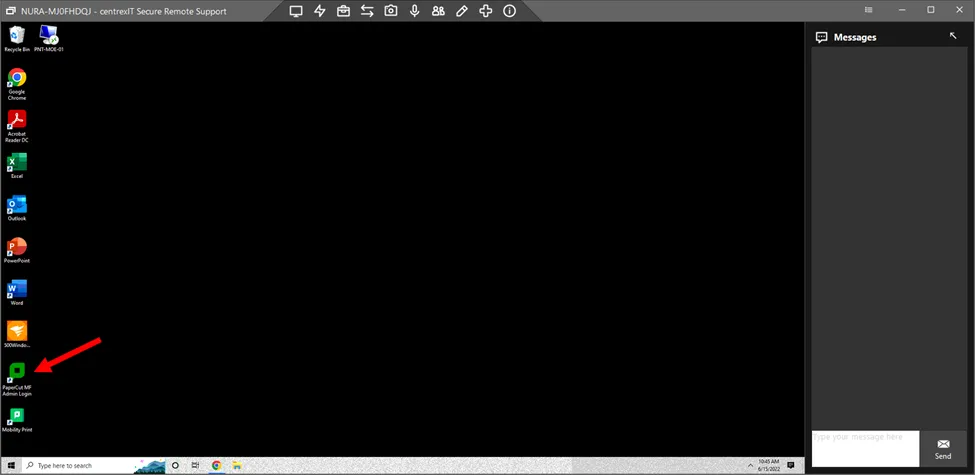
16. You will need to set up the “Mobility Printer” for this new user, please refer to the WI of
KB00001342 [retired]. Start by connecting to Nura’s print server, NURA-MJ0FHDQJ.
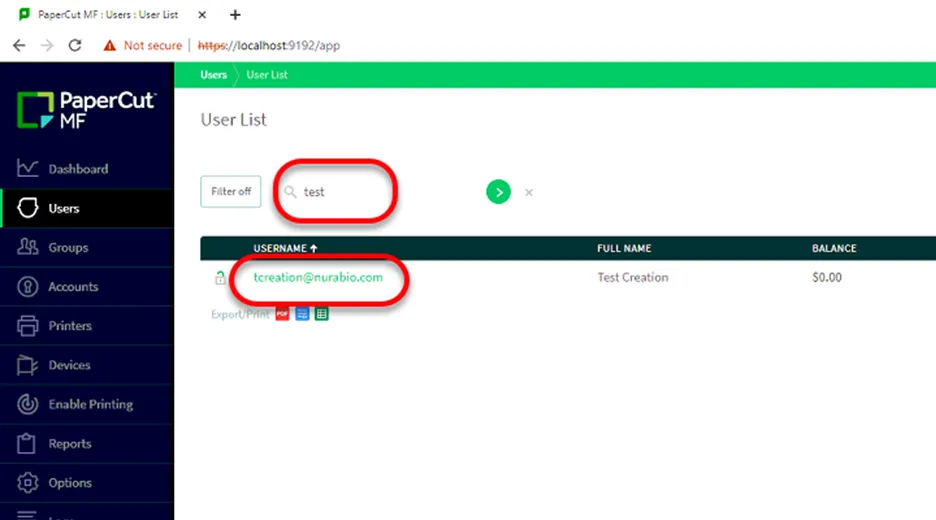
17. From the desktop, open the PaperCut MF Admin Login, and log in with the PaperCut credentials provided in PWState (admin). Most users will auto-populate at this point of the WI, under the Users tab, please verify the user has been populated by searching for them.
18. The remainder of the Mobility Print will need to be completed on the user’s device, please refer to the KB listed in step 16 for that walkthrough.
19. Most New User’s will require you to connect to their device and upload their profile. Reach out to the POC and coordinate the best time to do so. In addition, see if there are any pending items/requests prior to connecting to their device.
20. If the user does require you to connect to their computer, please reference KB00002333 [retired] (standard provision WI) and KB00001342 [retired] (Mobility Print) to complete the PC set-up. Always setup the user as a local admin unless requested otherwise.
21. Complete the IT Welcome Letter provided in KB00048849 with the New User’s information, send this directly to Maria Brar through email (NOT through the ticket).
22. Confirm that Maria has received the IT Welcome letter, and close ticket with permission.