The purpose of this document is to outline steps needed to configure secure SSH deployments of Dreamtsoft bundles using GitHub repositories.
Prerequisites:
Section titled “Prerequisites:”- An active GitHub account
- If working with Organization repositories, membership to the GitHub organization will be required
- GitHub repository with a “master” branch (currently required for Dreamtsoft bundle deployment)
- Git Bash installed on local workstation (installed with standard Git package, instructions here)
Generate SSH Key
Section titled “Generate SSH Key”Using Git Bash, generate a new RSA SSH key. Enter/execute following to generate a new private/public key pair (substitute actual name of key for <key_name>):
ssh-keygen -t rsa -b 4096 -m pem -f <key_name>For the following example, a key name of halo_dev_read_write has been used (we will use Halo as an example throughout this document):
ssh-keygen -t rsa -b 4096 -m pem -f halo_dev_read_writeWhile generating the key a passphrase will need to be entered, note the passphrase as it will be required later (we are currently storing this passphrase in the 1Password application Halo vault, along with the SSH public and private keys generated).
Navigate to the Git Bash working directory (use pwd to identify path) in local file system. There will be two files generated, one containing the private key using the key name selected earlier and another containing the public key with the key name and a .pub file extension. The private key will be used to configure the Dreamtsoft credential, and the public key will be used for the GitHub deploy key.

Configure GitHub Deploy Key
Section titled “Configure GitHub Deploy Key”Sign in to GitHub and navigate to the repository to be used for the deployment (whether personal, or in the case of our example within the organization). Select the repository then click Settings:

Now click “Deploy keys” on the left menu bar, then “Add deploy key”:
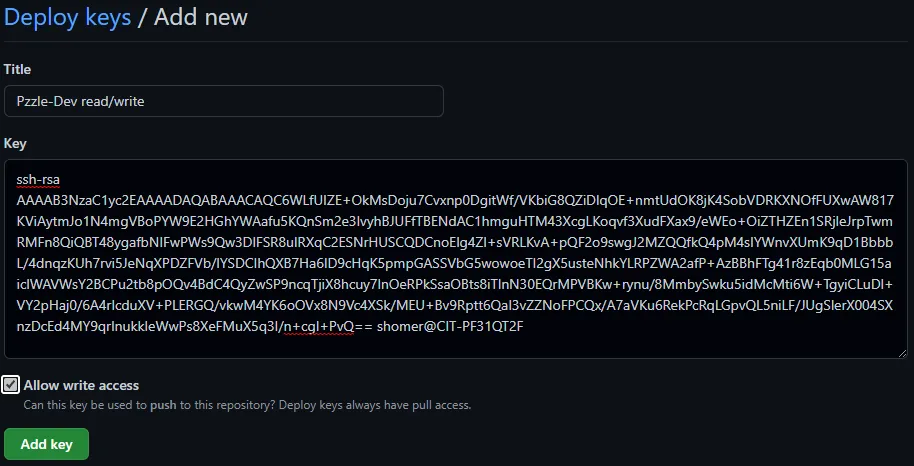
Enter the required information and select “Add key” to save, note the “Allow write access” option which allows either read/pull access (if not selected) or write/push access (if selected).
Note: Initially write access should only be configured for the Halo-Dev repository (Development environment) Deploy Key, as the other environments will have changes pushed/pulled from this repository.
The saved deploy key should look something like the following:

Configure Credential in Dreamtsoft
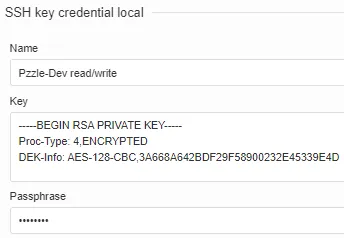
Section titled “Configure Credential in Dreamtsoft”In Dreamtsoft, navigate to the System bundle/area then to Credibility and Credentials. Create a new credential using “Add a new entry” on the top bar. When prompted for “What kind of record do you want to create?”, select the SSH Key Credential Local option.
On the detail page that appears specify a name for the credential, paste the private key from the SSH key generated, and enter the passphrase used at key creation:
Note: Again, initially read/write should only be used for the Development environment.
After entering required information save the record and return to the previous page.
Create a New Dreamtsoft Bundle with Empty Repository
Section titled “Create a New Dreamtsoft Bundle with Empty Repository”Note: For our example, we will be using the Halo-Dev repository and Development Dreamtsoft environment/instance.
In Dreamtsoft navigate to the bundle workspace (Alt+w shortcut, or using the “Application bundles” icon  on top right of UI).
To install a new bundle, which has not yet been published/pushed to GitHub, select “New bundle” from the top menu bar, then “Create a new bundle”:
Back in GitHub, locate the SSH URL for the repository to be used for the remote deployment and copy it:

In Dreamtsoft, in the New Bundle window, configure the bundle Title/name as per the following example:
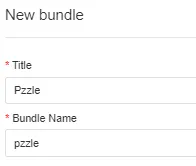
Click OK to save.
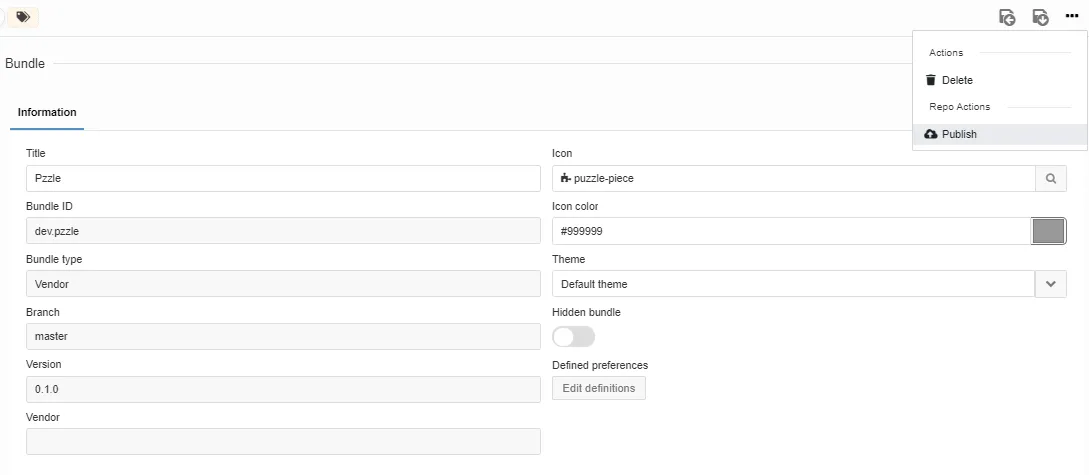
Back in the “Application bundles” window click the  icon to configure the Halo bundle. Select an icon (and change other settings as needed/desired, and save), then click the sub-menu on the top right (…) and select Publish.
For the Publish Info window that appears enter the SSH URL copied earlier for the target GitHub repository, select “Use existing credential”, select the appropriate credential, then click OK.
If everything has been configured correctly the following dialog will appear:
In the configuration window for the Halo bundle, verify the bundle is able to publish changes to GitHub:
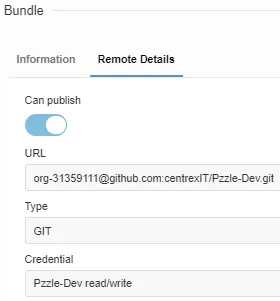
The Dreamtsoft bundle will now push changes to the configured GitHub repository.
Note: “Can publish” should only initially be used/configured in the Development environment (for Halo-Dev repository), as the other environments/repositories will be pulling from Development.
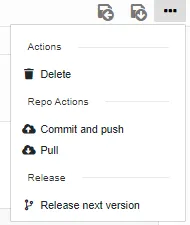
Use the sub-menu (…) on the top menu bar to find/execute actions for the remote repository (Dreamtsoft will automatically commit changes to the remote repository when bundle is modified, and can be managed in the bundle workspace):
Create a New Dreamtsoft Bundle with Existing/Cloned Repository
Section titled “Create a New Dreamtsoft Bundle with Existing/Cloned Repository”In Dreamtsoft navigate to the bundle workspace (Alt+w shortcut, or using the “Application bundles” icon on top right of UI).
To install a new bundle that will be using an existing GitHub repository (e.g.; from a clone), select “New bundle” from the top menu bar, then “Install a bundle from a URL”:
Back in GitHub, locate the SSH URL for the repository to be used for the remote deployment (in our Halo example, this would be a cloned repository in an environment other than Development).
In Dreamtsoft enter the necessary information in the “Load remote GIT bundle” screen, where the URL is the SSH URL from the GitHub repository and “Use existing credential” is selected and the specific credential needed:
Click OK to save, additional bundle configuration can be performed from the bundle details/configuration page.
Note: “Can publish” should only initially be used/configured in the Development environment (for Halo-Dev repository), as the other environments/repositories will be pulling from Development. Also, a ready only Deploy Key should be used for the Dreamtsoft credential created for environments other than Development.
Use the sub-menu (…) on the top menu bar to find/execute actions for the remote repository.