Purpose: This How-To is to support Exchange Hybrid Migrations usually performed by the Project Team. When preparing for an email migration using the Exchange Hybrid Setup, on-prem mailboxes get an SMTP alias set up for “alias@clientdomain.mail.onmicrosoft.com” if they have email address policy inheritance enabled. This allows Exchange Online to relay mail for the on-prem mailboxes. For mailboxes that have inheritance turned off, they do not get the SMTP alias, and will eventually fail the mailbox migrations and will not be able to receive mail from the Exchange Online mailboxes.
Export the list of mailboxes set to not inherit the email address policy.
Section titled “Export the list of mailboxes set to not inherit the email address policy.”To start, you’ll need to identify which mailboxes are not inheriting the email address policy. To do so, run the following powershell script on the Exchange Server.
Get-Mailbox -ResultSize Unlimited | Where-Object {$_.EmailAddressPolicyEnabled -eq $False} | Select-Object Name,PrimarySmtpAddress,SamAccountName,EmailAddressPolicyEnabled | Export-CSV C:\Temp\NotInheriting.csv -NTI -Encoding UTF8
This script exports the data to a CSV file and stores it in c:\temp\ on the server you run it from. The name of the file will be “NotInheriting.csv.” Save this file to your computer as you will need to modify it in the next step.
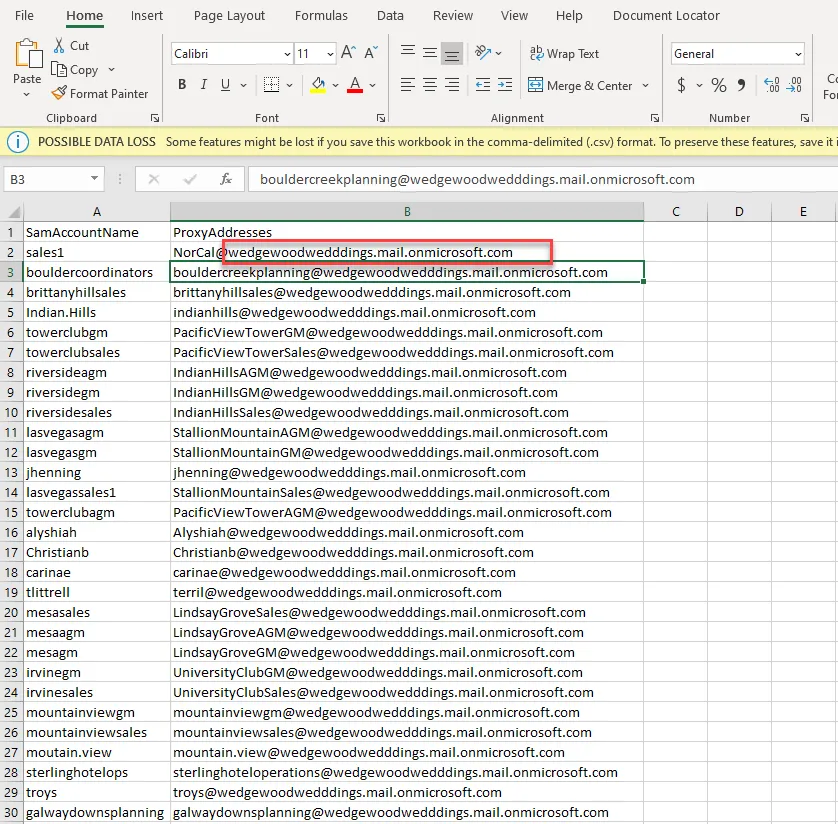
Prep the CSV with the new SMTP alias information.
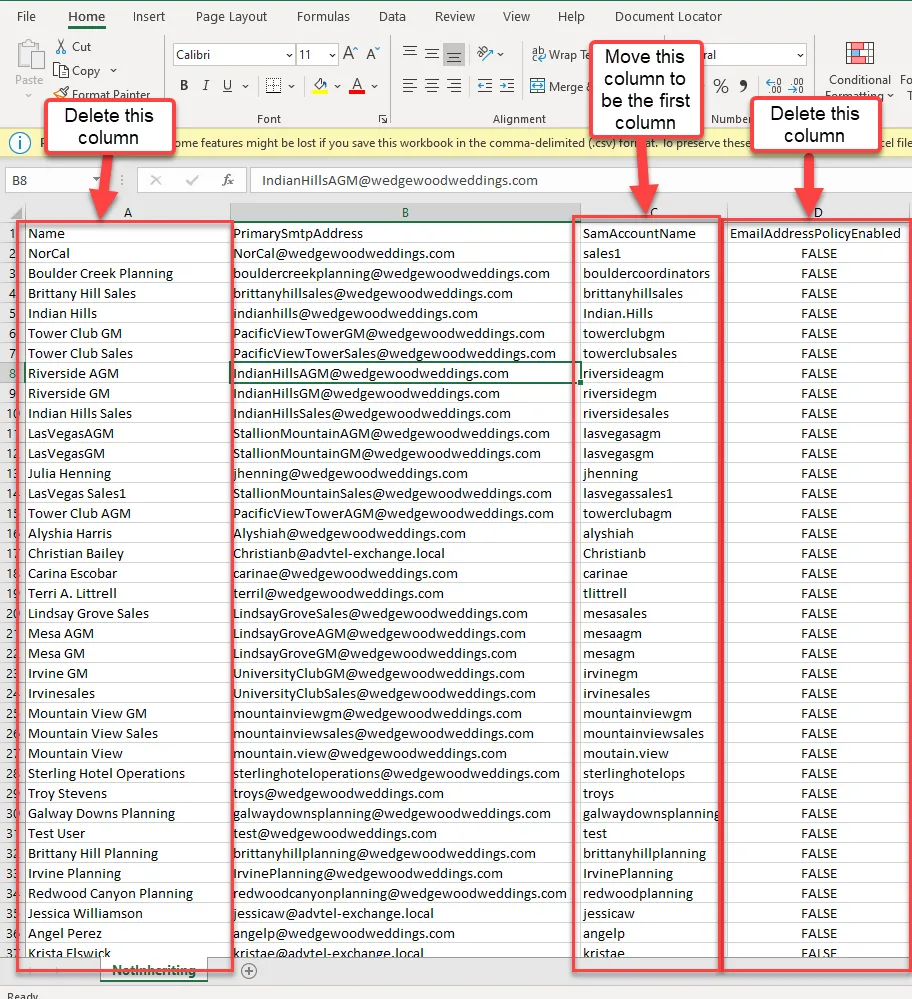
Section titled “Prep the CSV with the new SMTP alias information.”We’ll be modifying the CSV file to add the SMTP aliases, also referred to here as ProxyAddresses. Open your CSV file. You can delete the columns named “Name” and EmailAddressPolicyEnabled” since we don’t need them. Move the column SamAccountName and make it the first column.
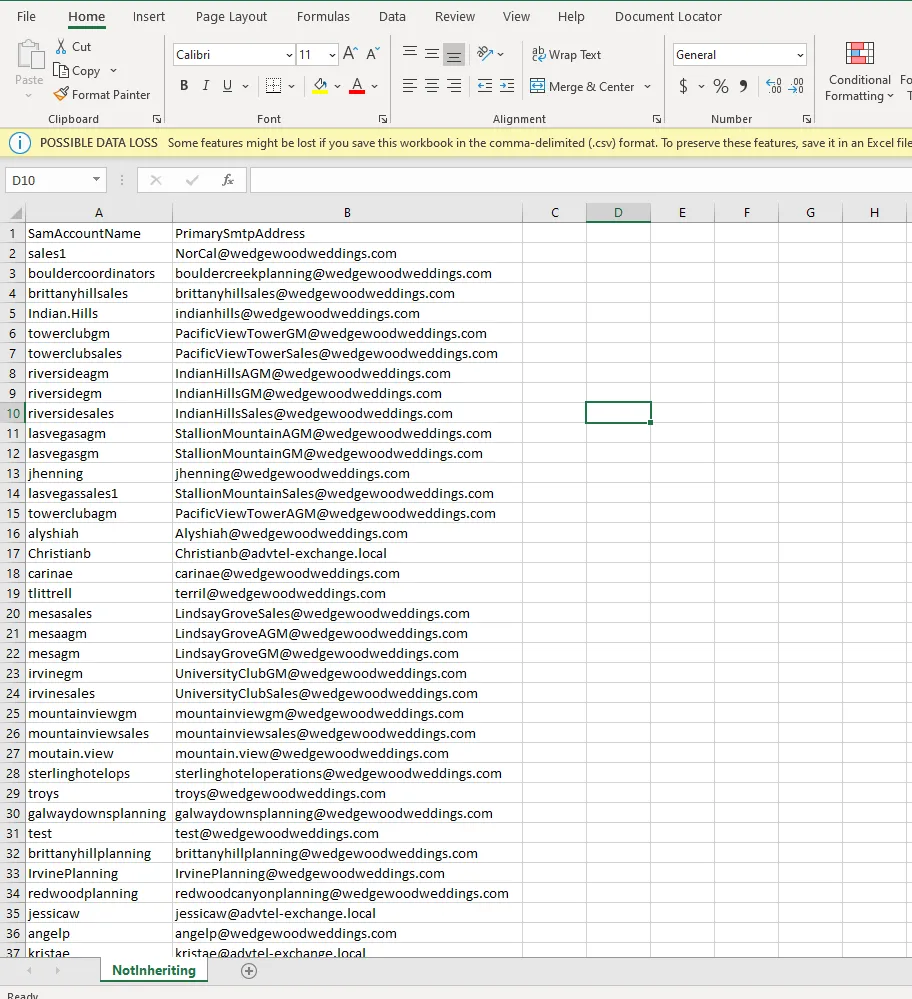
You spreadsheet should look like this after making the changes:
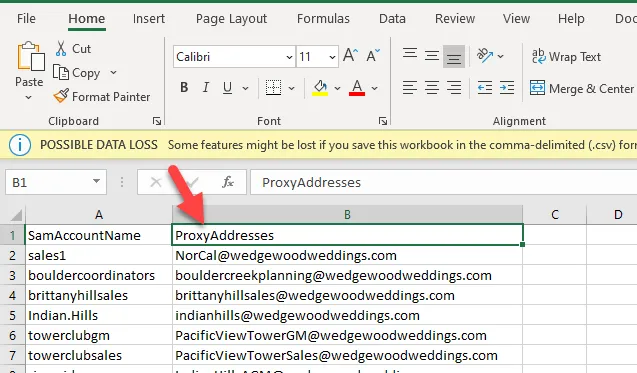
Rename Column B from “PrimaySmtpAddress” to ProxyAddresses”
You’ll use the replace function to replace the existing domain name in the spreadsheet so that each user has a corresponding “domain.mail.onmicrosoft.com” account. In this example, we want these mailboxes to have the “wedgewoodweddings.mail.onmicrosoft.com” address, so we use the replace function to manipulate our CSV.
Note: please verify in Onpremise Exchange what the routable Exchange Online alias is by looking at a mailbox that has inheritance turned on. You’ll look at the SMTP alias and should see the correct domain.mail.onmicrosoft.com.
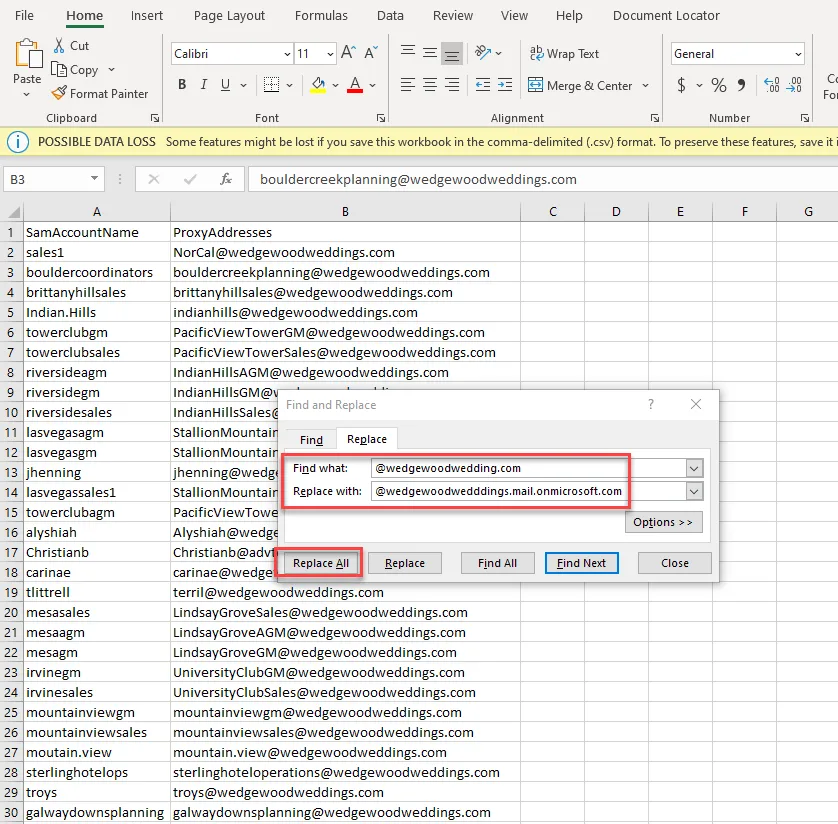
Once you click replace all, the values will be updated accordingly. See example:
Save the file and name it something you can remember, like NonInheritanceProxyAddressUpdate.csv, since we’ll need it for the next step.
Add the SMTPalias to the mailboxes in Exchange.
Section titled “Add the SMTPalias to the mailboxes in Exchange.”Now that we’ve prepped our CSV with the new SMTPalias information, we will use a Powershell script to update the mailboxes listed in the spreadsheet with the corresponding SMTPalias. By doing this, we are basically manually adding the SMTPalias it needs for Exchange Online to be able to see and communicate with those mailboxes in Exchange Onprem.
Save your updated CSV file to C:\temp on the Exchange server.
Run Powershell in elevated privileges mode (run as administrator). Past the following script. Be sure to update the script to match the client-specific information.
Import-Csv “C:\temp\NonInheritanceProxyAddressUpdate.csv” | foreach {Set-ADUser -Identity $_.samaccountname -add @{Proxyaddresses=$_.Proxyaddresses -split ”,”}}
This script will import the CSV into Powershell, and then will update the user listed in the SamAccountName column to add the corresponding alias listed in the ProxyAddresses column.
Spot check a few of the mailboxes in your CSV and make sure they have the new SMTPalias. Once this is done, you’ve successfully added and accounted for all mailboxes to have the SMTPalias and will be ready to continue the next steps for your Exchange Hybrid Migration project.